| **1.**
In the provider selection window, choose **Schneider KNX** to proceed the project setup based on this home automation service provider.
See the [**list of smarthome providers**](https://docs.sim-on.com/books/2-getting-started/chapter/providers) in **detailed project setup**, to check which ones are supported. | 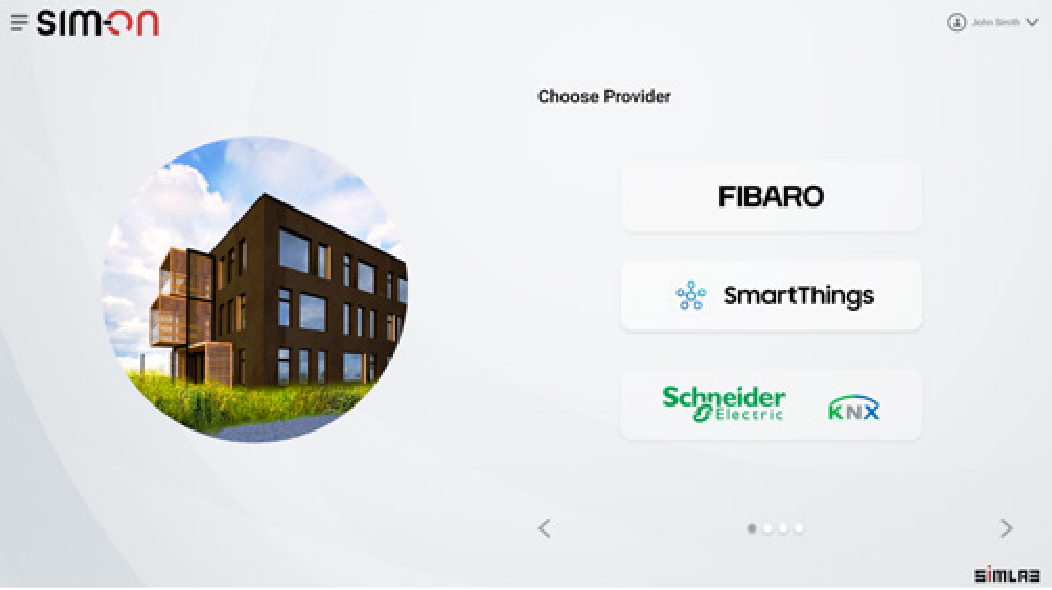 |
| **2.** Once KNX has been selected, you need to connect to the KNX IoT 3 Party API server (*the Wiser for KNX in this case*). The security protocol gets started, ensuring a safe environment for the involved solutions to work together. | 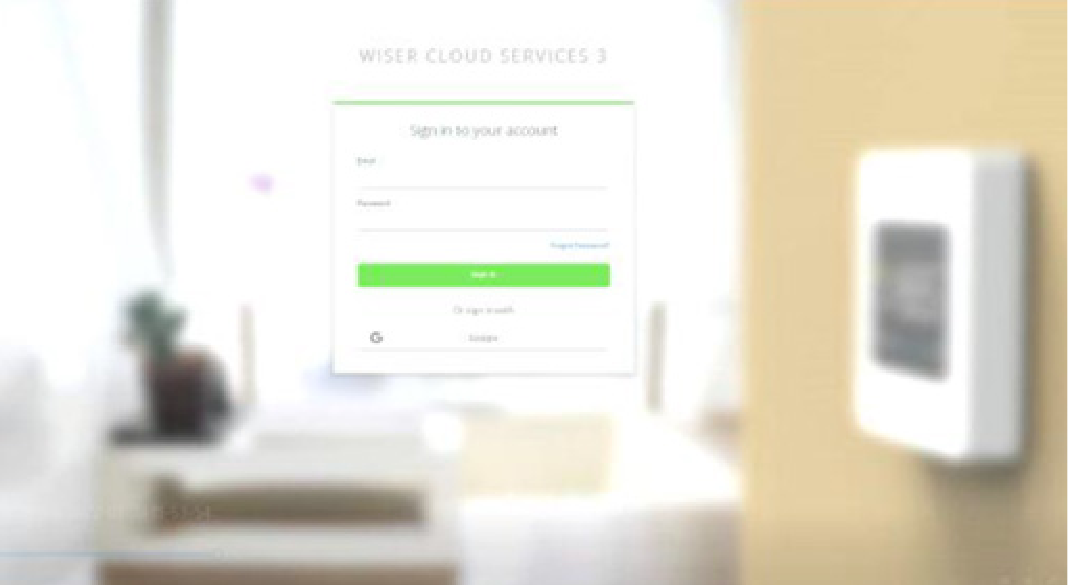 |
| **3.** Once you get access to the KNX IoT 3 Party API server, the software client initiates the authorization process, based on the OAuth2.0 (*the industry-standard protocol for authorization*). OAuth2.0 has the advantage of allowing third parties to access subsets of data without knowing the customer credentials, among other benefits. | 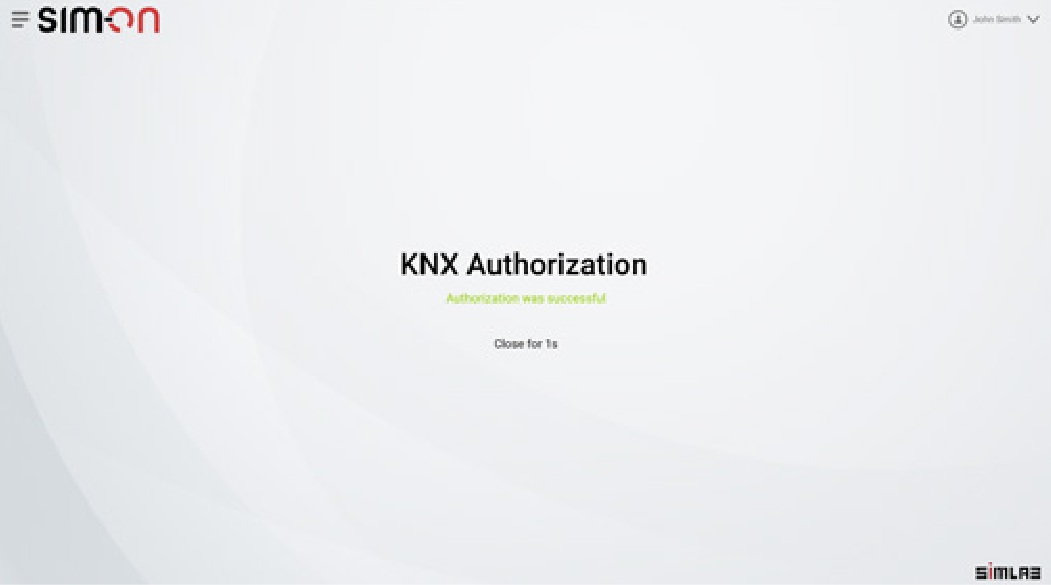 |
| **4.** Now you can select the rooms to be added to the Digital Twin. This information is provided by the KNX IoT 3 Party API server. Every room contains functions and a selection of datapoints. Note that at this point, the developer does not need to deal with group addresses or KNX- specific knowledge: simply retrieve human-readable information. | 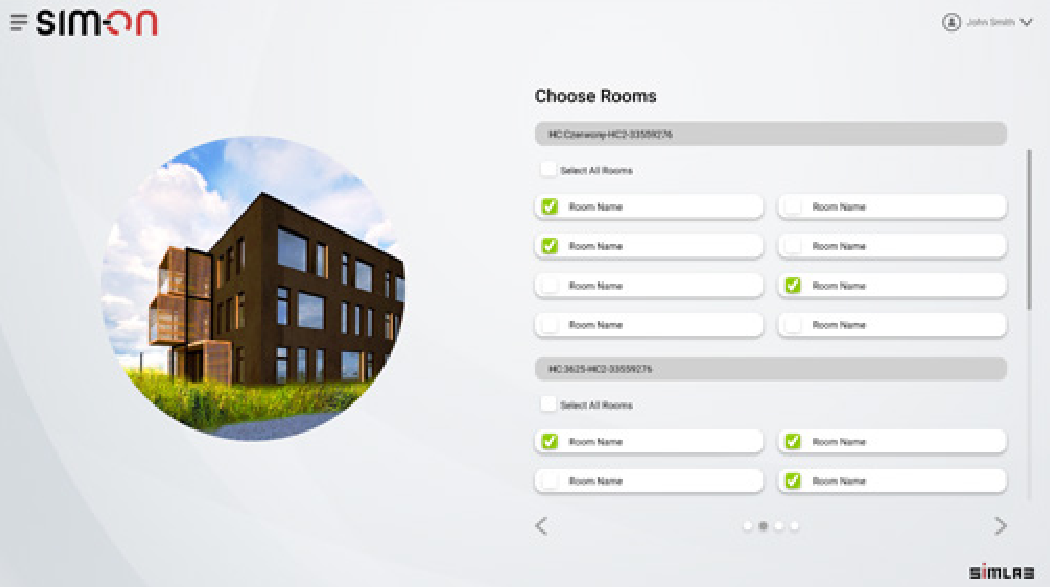 |
| **5.** At this point, the Digital Twin has information about the rooms and functions found in the real installation. It is time to offer this information over a 3D model, by using a 3D scanning carried out using Matterport: the outcome is a space representation with coordinates, similar to what is represented in Street View from Google Maps (but indoors). The scanning can be done by professionals, or by yourself with an app on your smartphone. | 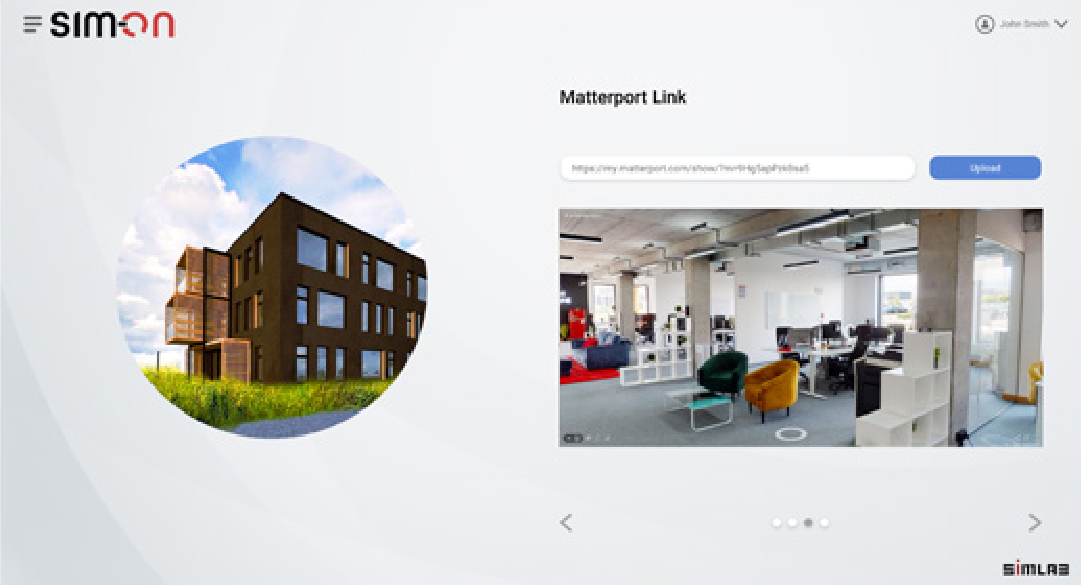 |
| **6.** Digital Twin is ready to be used: you can navigate in the 3D environment. The control is bidirectional, the feedback from KNX achieved by means of WebSockets (*instead of the more resource-intensive polling*). |  |
You can add a provider by selecting Providers in the side bar, and then clicking on button. The process will look exactly the same.
You can also delete a connection by clicking on button. Note that the devices imported from the selected hub will be also deleted.
# SmartThings| **1.**
To connect with **Samsung's SmartThings**, choose the option to Import rooms and select **SmartThings**. You will be redirected to the **Samsung Account** page.
See the [**list of smarthome providers**](https://docs.sim-on.com/books/2-getting-started/chapter/providers) in **detailed project setup**, to check which ones are supported | 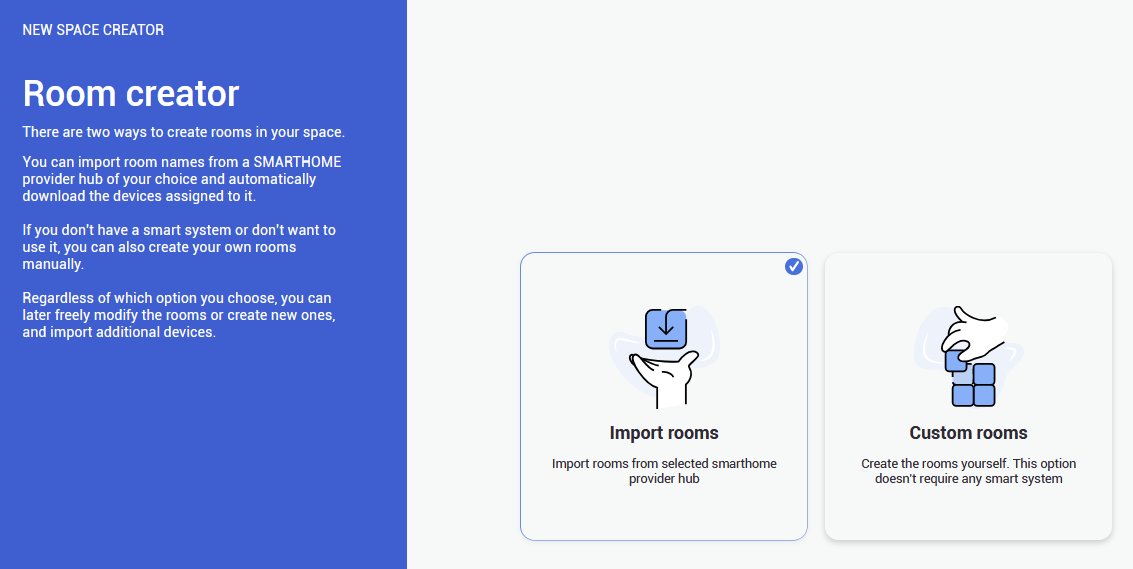 |
| **2.** On the **Samsung's Account page** you will be asked to log into your **Samsung Account**, to proceed. | 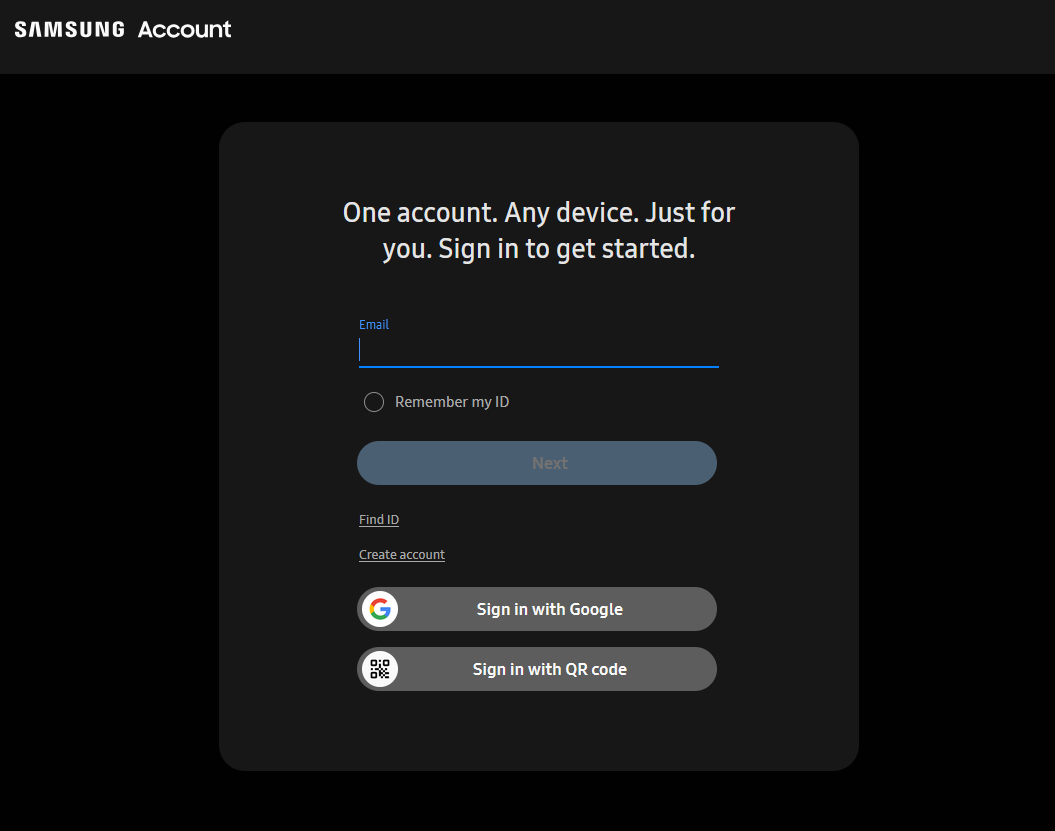 |
| **3.** After you log in, you need to allow access for **SIM-ON** to connect to the system. In the dropdown window you will see all of the available, connected hubs. | 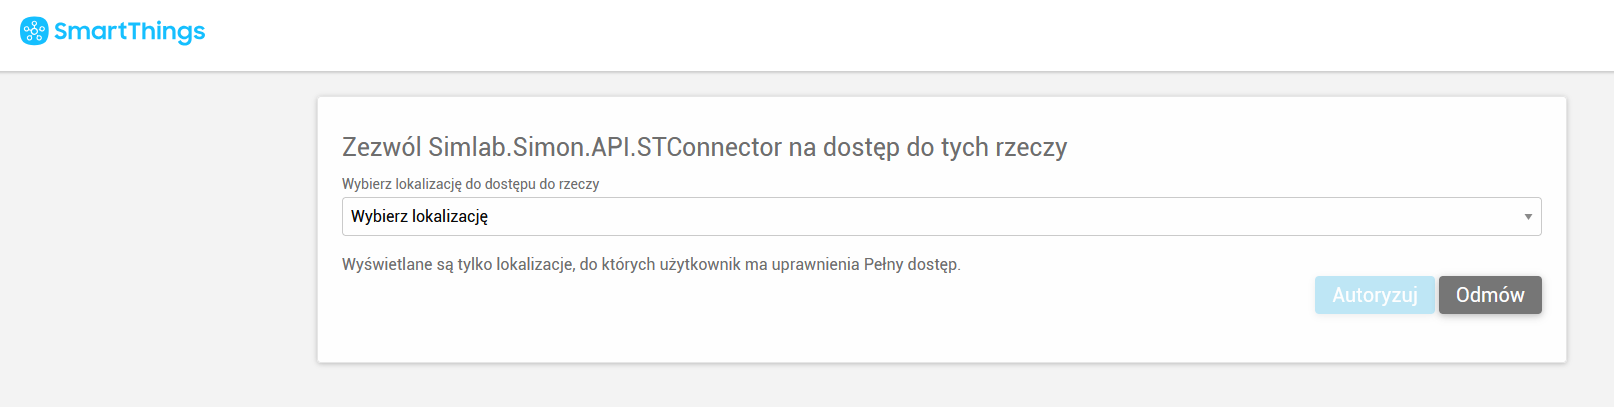 |
| **4.** After choosing the hub, you need to set all the privileges to authorize the connection. Repeat these two steps (3,4) to add multiple hubs. | 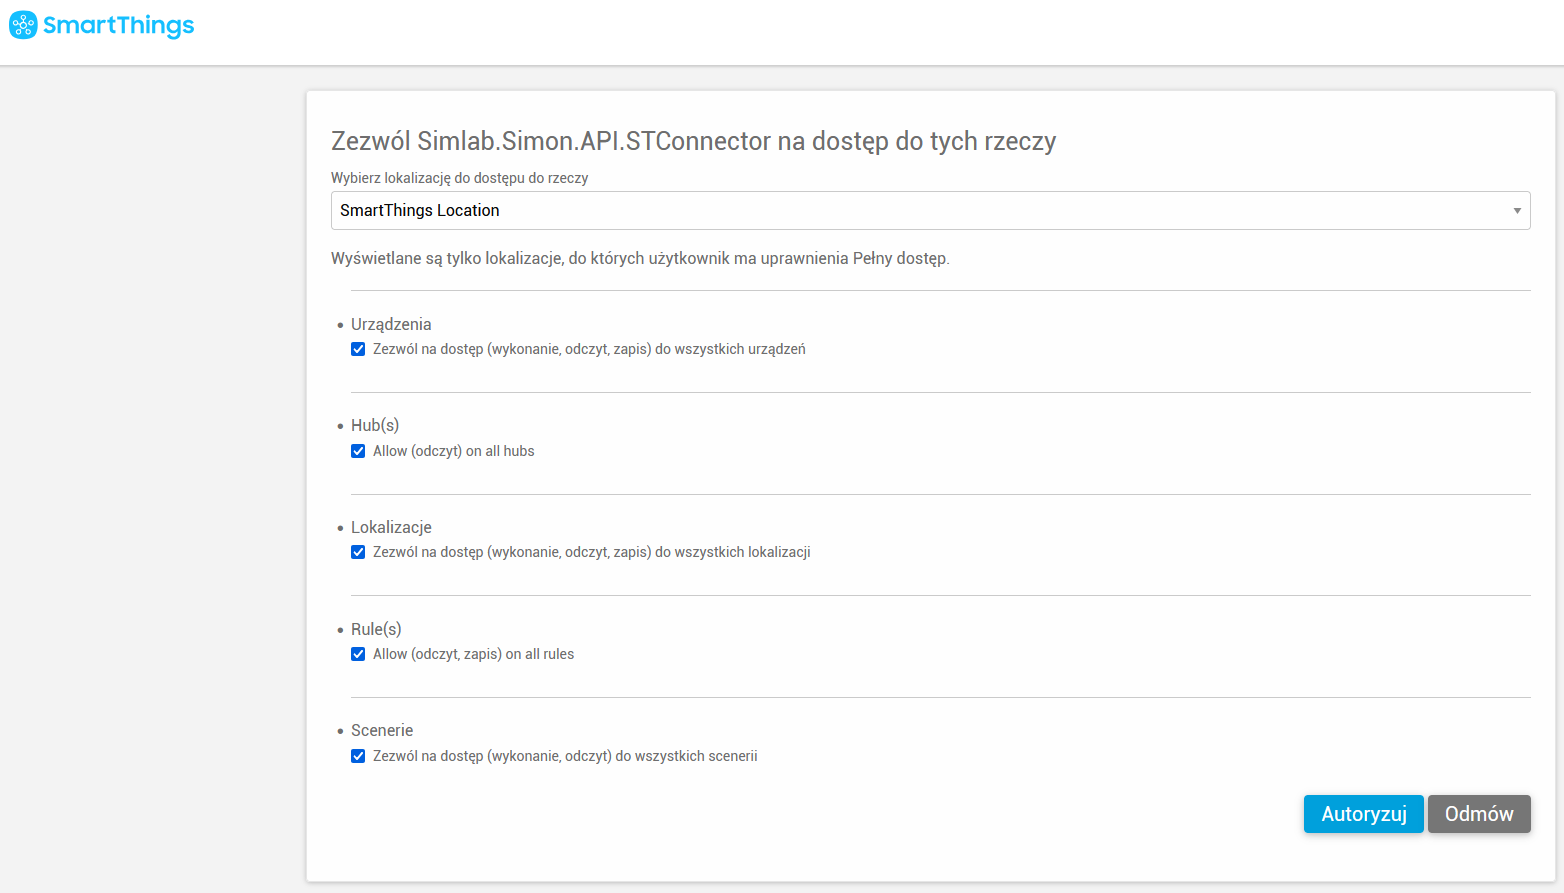 |
| **5.** After completing **Authorization**, you need to go back to the **SIM-ON** tab and the hub(s) you added will be now available. Now you can add room(s) from the hub for the project. | 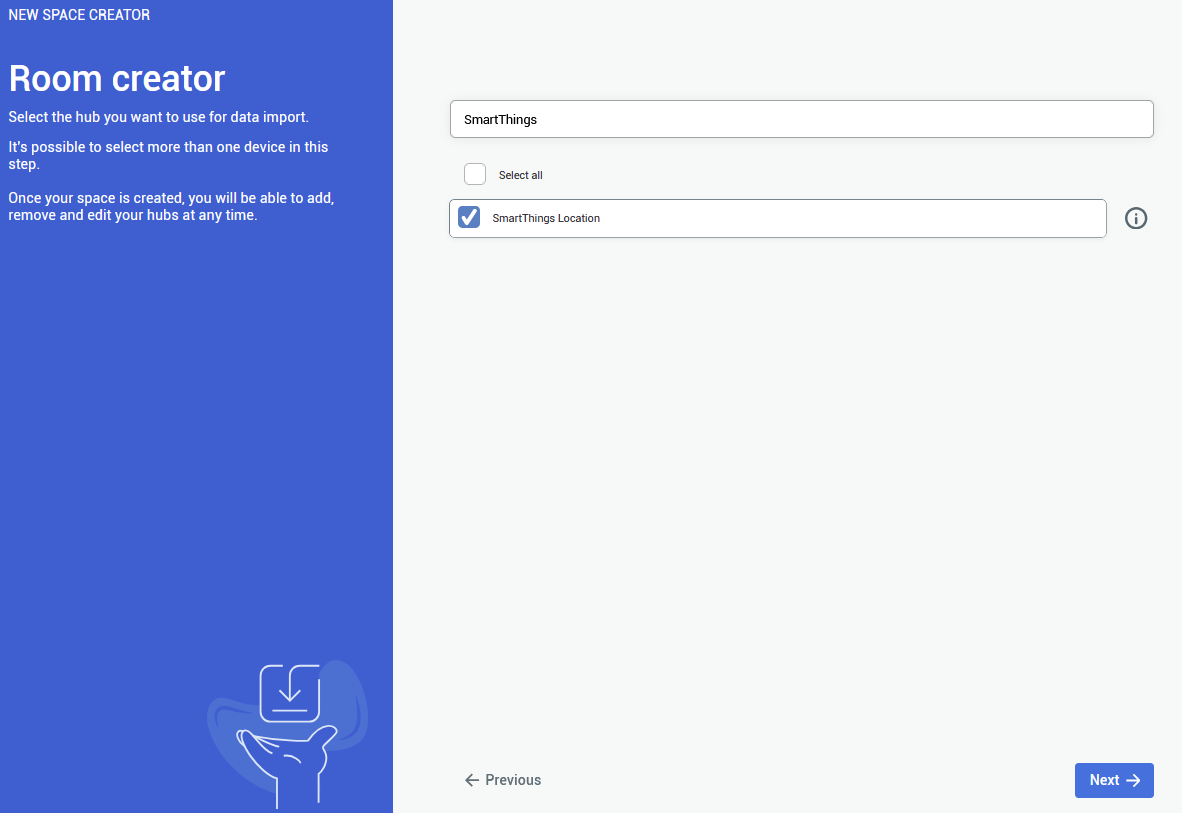 |
| **6.**
Here you will be presented with the list of already existing rooms in your **SmartThings** hub. Choose any number of the rooms to be imported to **SIM-ON** then proceed.
You are not required to import any of the rooms, although it is recommended - to keep the consistency between smarthome environments Rooms can be added and edited afterwards as well | 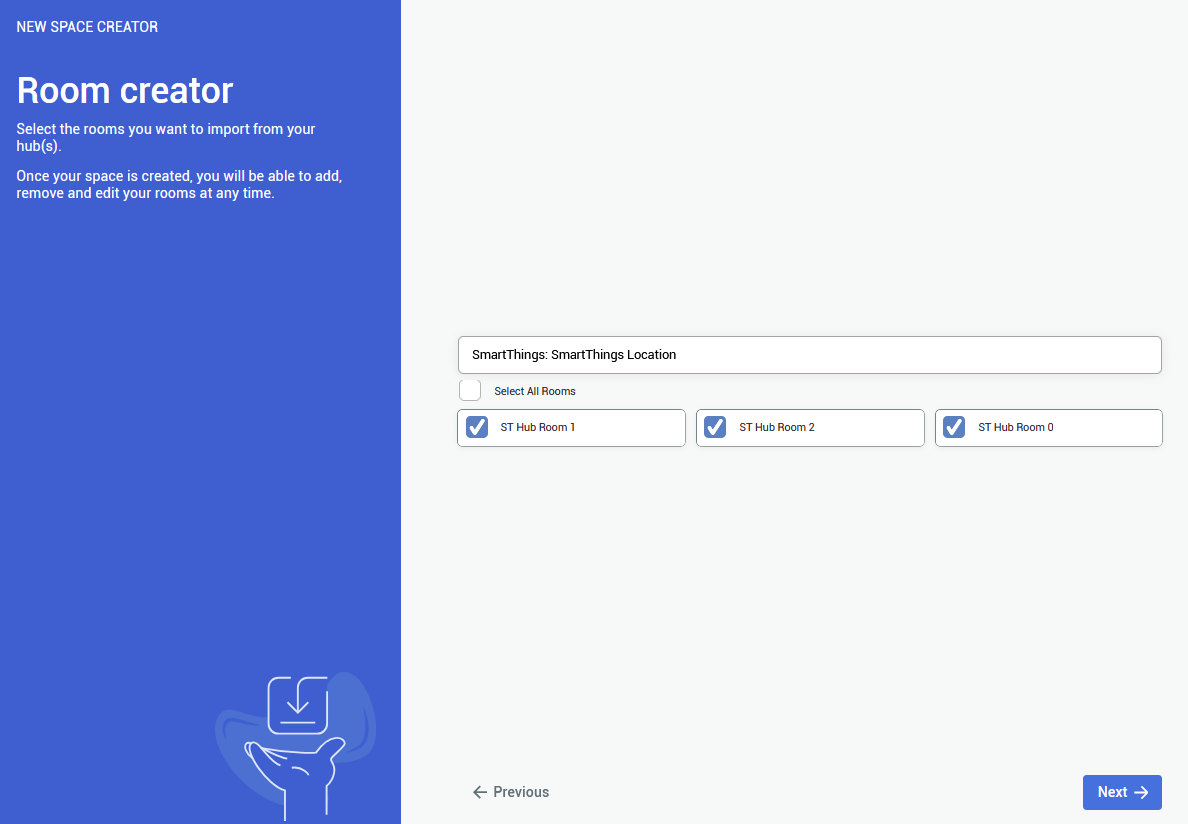 |
| **7.**
The last step is to choose the **Matterport virtual tour** for the project to be used, through the provided **Matterport link**.
To use a **private link** you will be asked to **log in** to appropriate **Matterport Account** | 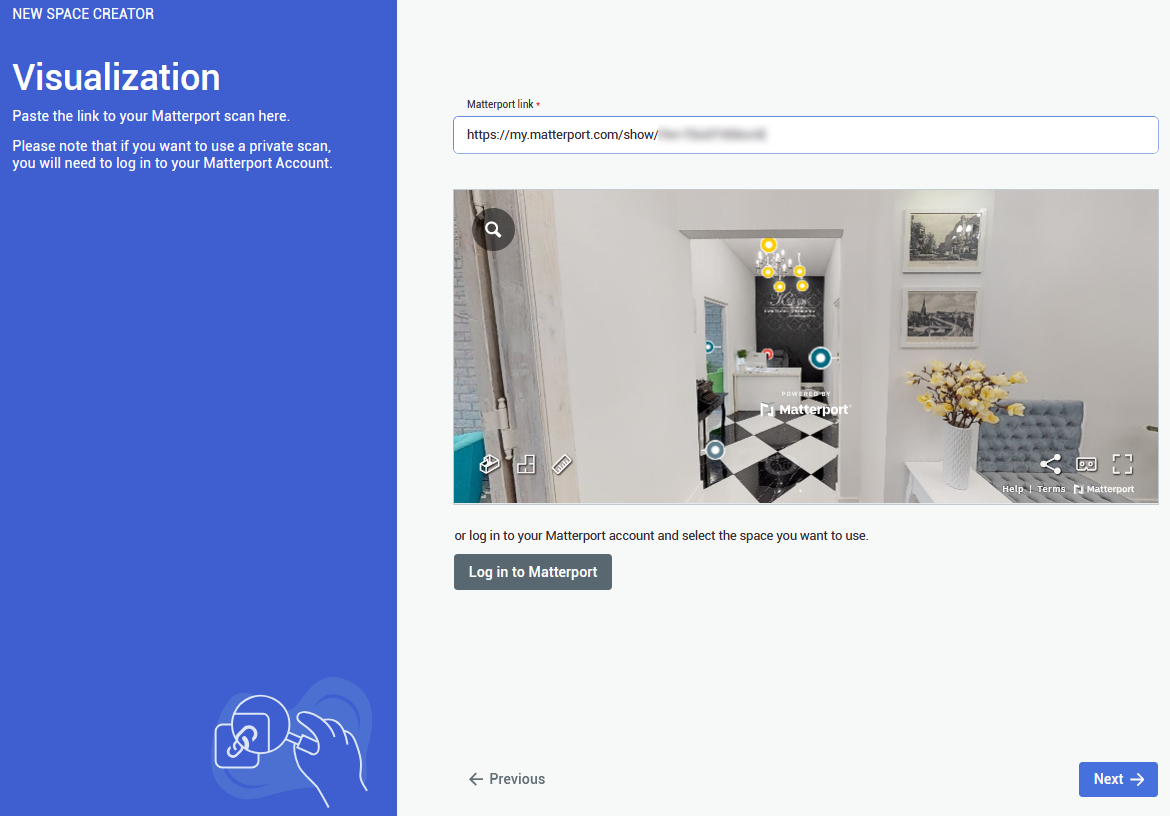 |
| **8.** **Congratulations!** You've successfully imported the devices from **Samsung SmartThings**. By clicking confirm, you will see your space with an access to all of the devices. |  |
You can add a provider by selecting Providers in the side bar, and then clicking on button. The process will look exactly the same
You can also delete a connection by clicking on button. Devices imported from the selected hub will be also deleted
# NETxTo learn how to setup **NETx** for SIM-ON integration, see **Official NETx** [**Integration with SIM-ON digital twin platform**](https://docs.sim-on.com/Integration%20with%20SIM-ON%20digital%20twin%20platform)
---| **1.**
In the provider selection window, choose **NETx** to proceed the project setup based on this home automation service provider.
See the [**list of smarthome providers**](https://docs.sim-on.com/books/2-getting-started/chapter/providers) in **detailed project setup**, to check which ones are supported | 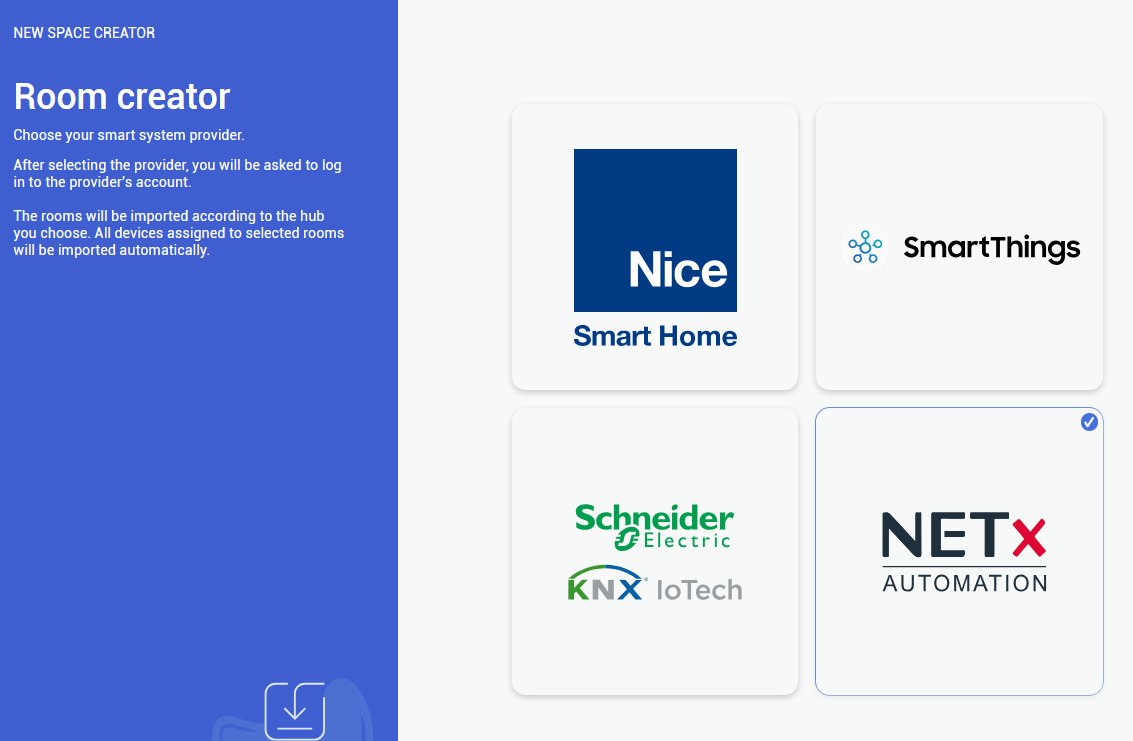 |
| **2.** In the next step, you need to provide all essential information, so Login, Password, Remote access ID and Remote access name (can be custom) | 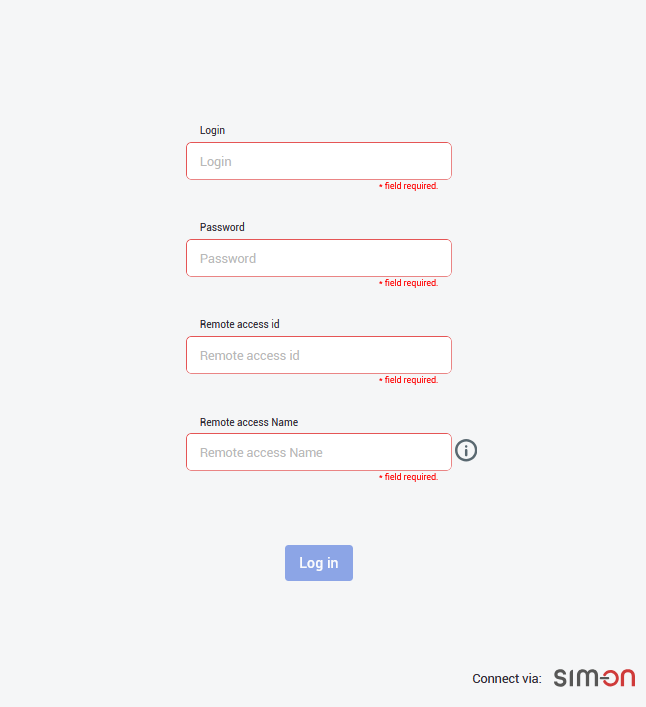 |
| **3.** After logging in, you need to choose the central smarthome hub, from which the available rooms will be displayed. | 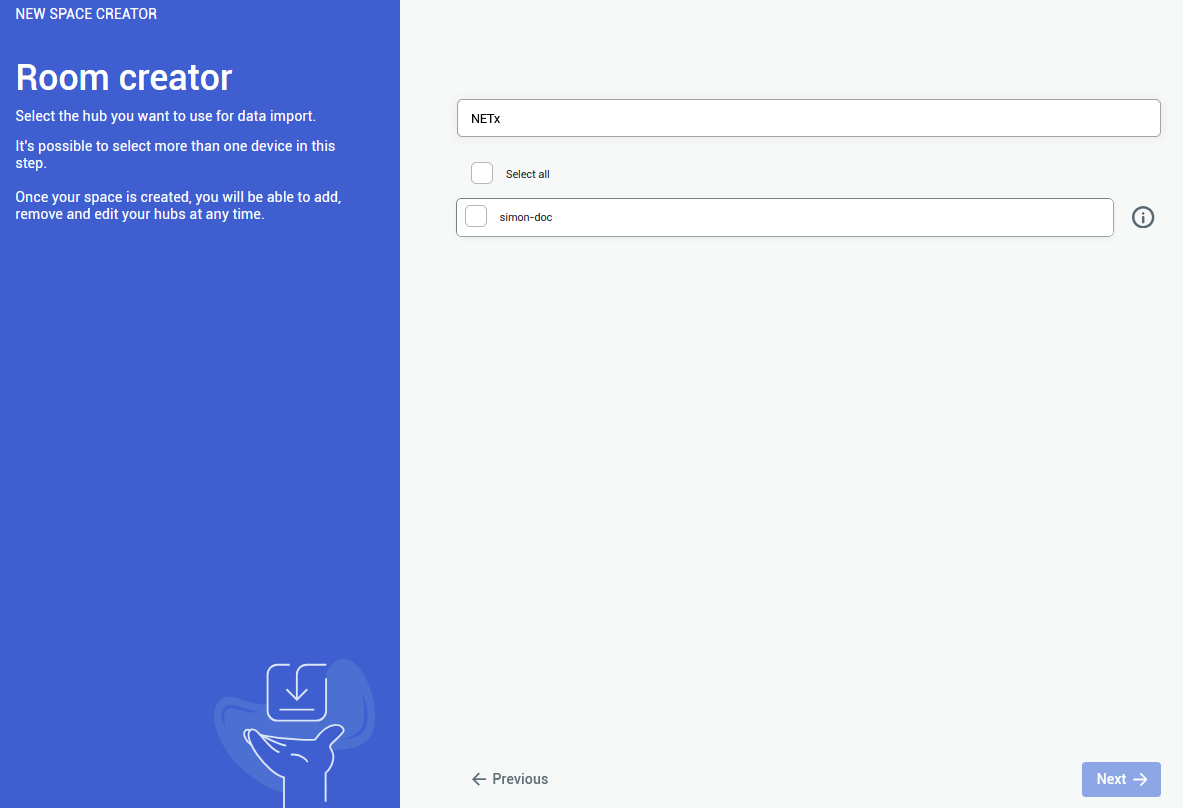 |
| **4.**
After selecting the central hub, you will be shown a list of all the available rooms, that were created in your NETx application.
Choose at least one room, to proceed further.
You are not required to import all of the rooms, although it is recommended - to keep the consistency between smarthome environments Rooms can be added and edited afterwards as well | 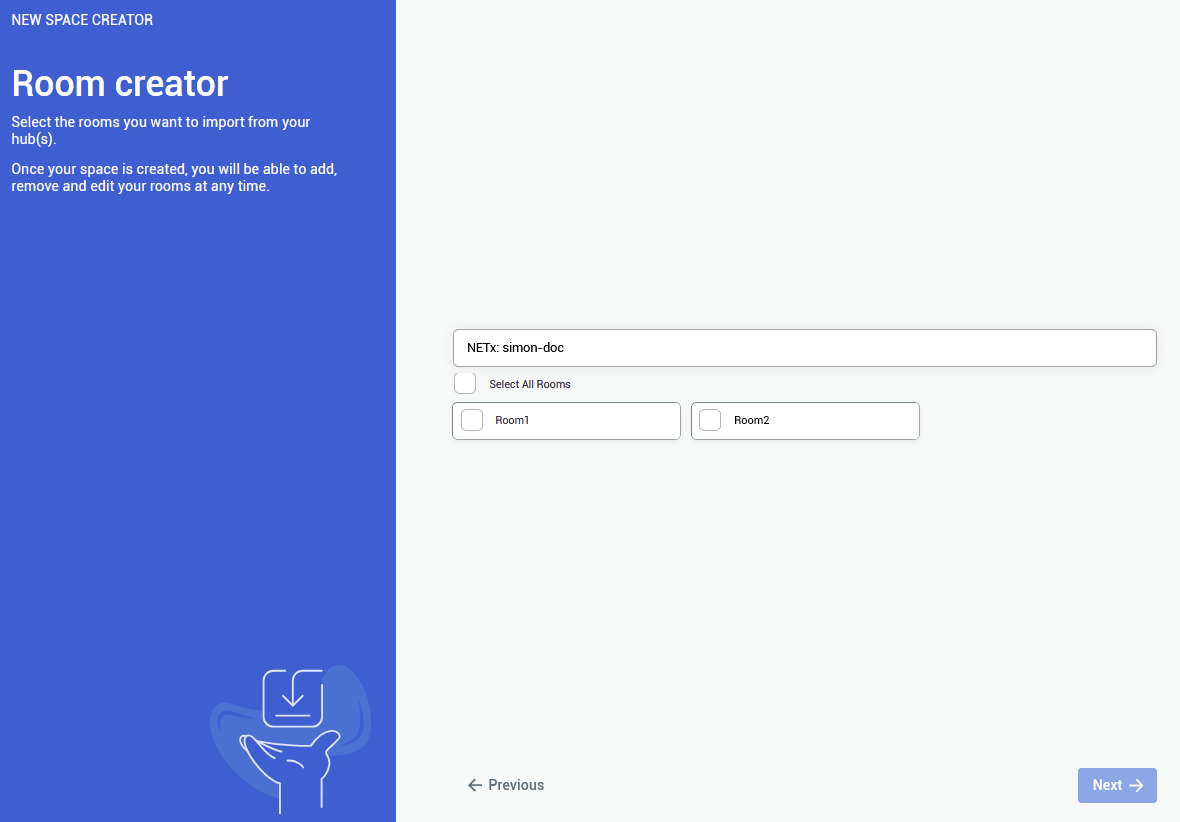 |
| **5.**
The last step is to provide a **Matterport Virtual Tour** link. Either public o private link is accepted.
To use **private link**, you are required to **log in** to an appropriate **Matterport Account** |  |
| **6.** At the end you will be shown a summary of your project setup. After making sure that everything is as it should be, **confirm** to finalize the project creation. |  |
You can add a provider by selecting Providers in the side bar, and then clicking on [](https://docs.sim-on.com/uploads/images/gallery/2024-08/add-connections.png)button. The process will look exactly the same.
You can also delete a connection by clicking on [](https://docs.sim-on.com/uploads/images/gallery/2024-08/remove-connections.png)button. Devices imported from the selected hub will be also deleted
# Fibaro| **1.**
In the provider selection window, choose **Fibaro** to proceed the project setup based on this home automation service provider.
See the [**list of smarthome providers**](https://docs.sim-on.com/books/2-getting-started/chapter/providers) in **detailed project setup**, to check which ones are supported You will be redirected to **Fibaro login page**. | 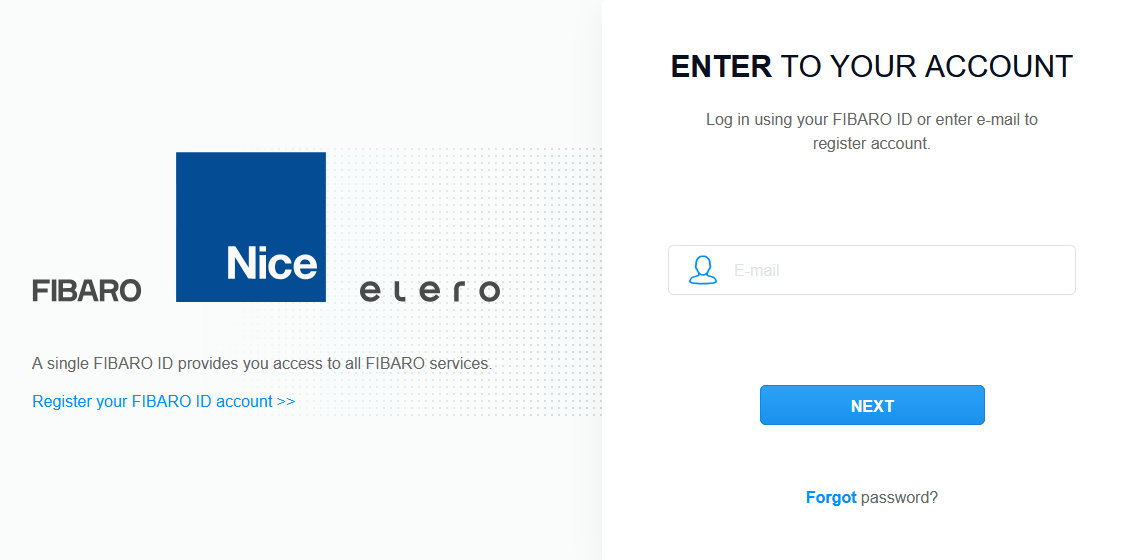 |
| **2.** After logging into your **Fibaro Account**, you will see the list of available **smarthome hubs**. Select the appropriate one(s) and proceed. | 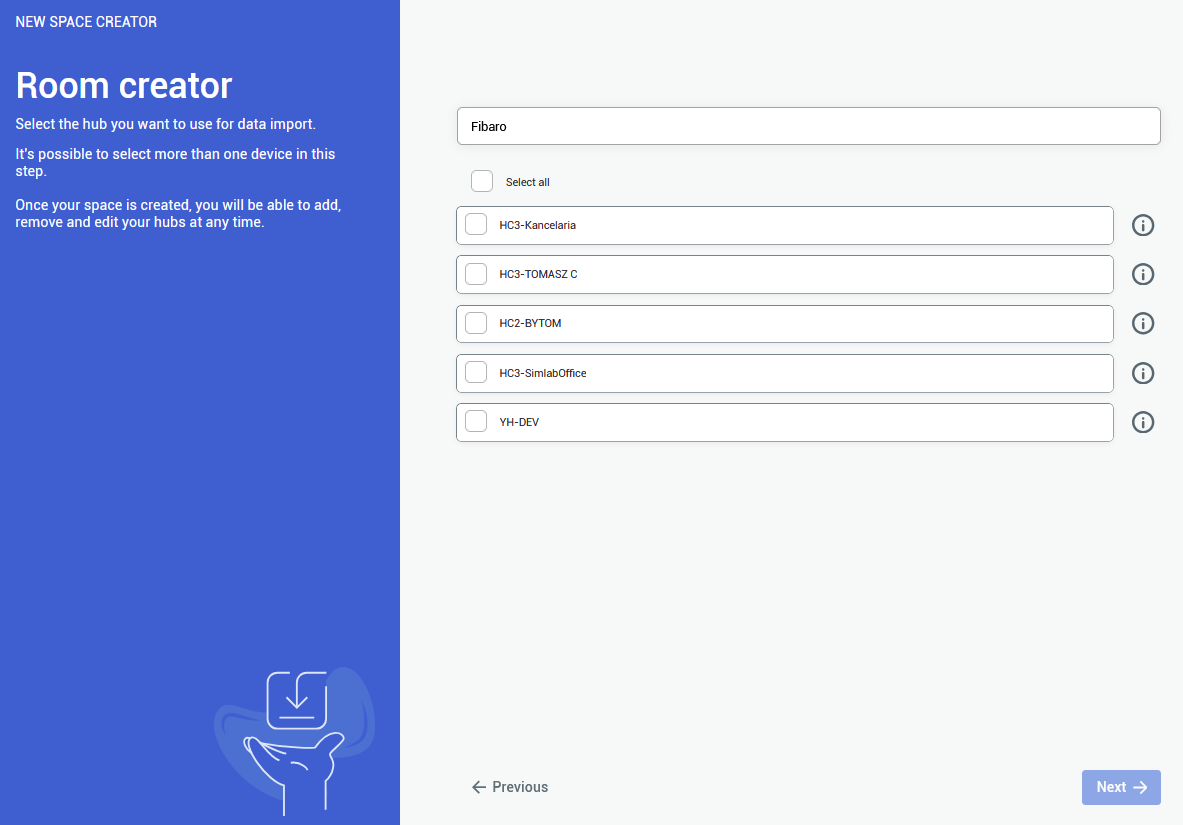 |
| **3.**
Here you can import the rooms. Pick at least a single room to be imported.
You are not required to import all of the rooms, although it is recommended - to keep the consistency between smarthome environments Rooms can be added and edited afterwards as well | 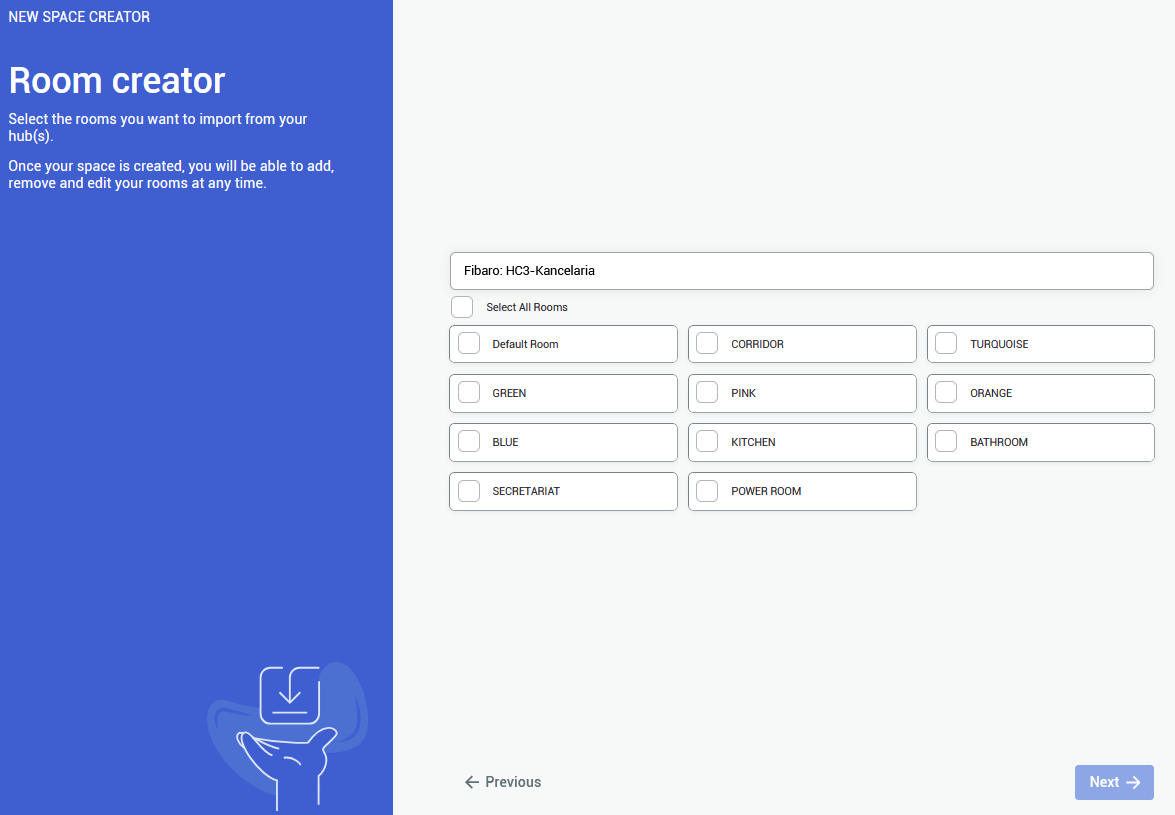 |
| **4.**
The last step is to provide a **Matterport Virtual Tour** link. Either public o private link is accepted.
To use **private link**, you are required to **log in** to an appropriate **Matterport Account** | 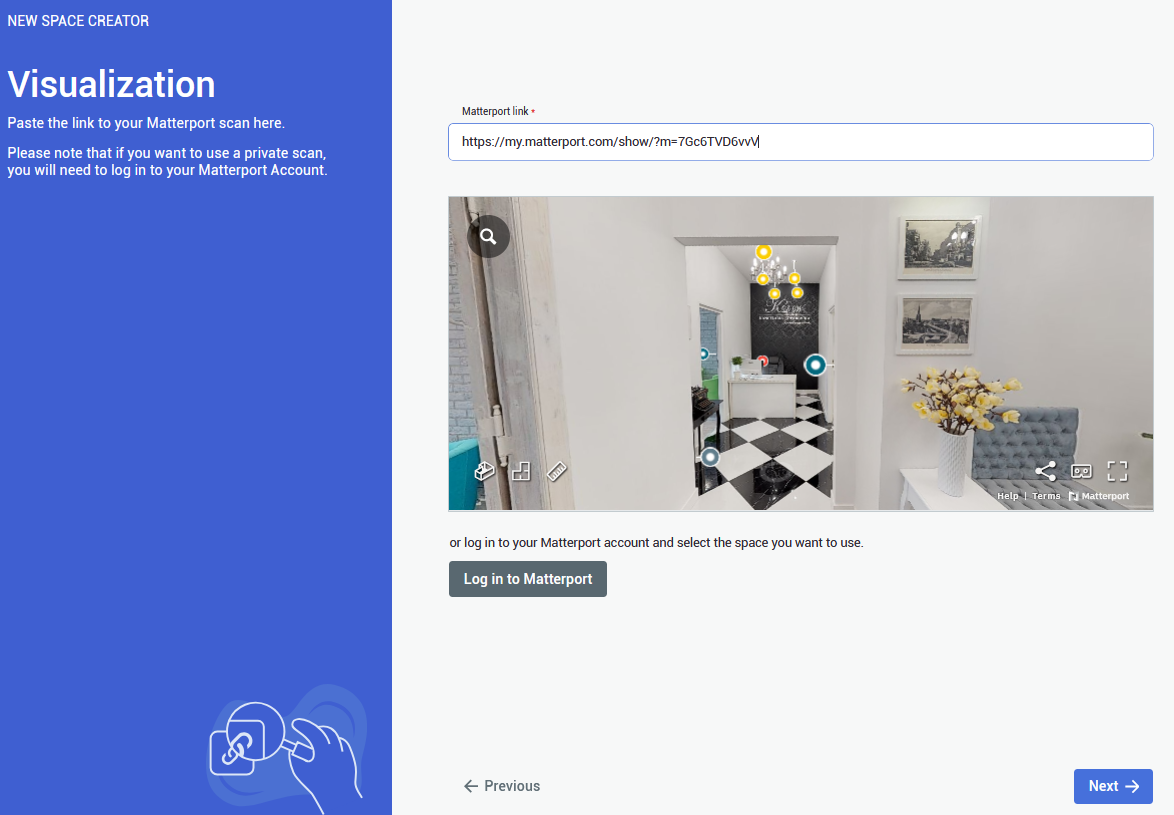 |
You can add a provider by selecting Providers in the side bar, and then clicking on button. The process will look exactly the same
You can also delete a connection by clicking on button. Devices imported from the selected hub will be also deleted
# IBM Maximo 1\. To connect an IBM Maximo provider, after [**creating a Project Space**](https://docs.sim-on.com/books/2-getting-started/chapter/project-setup) - navigate to the **[Providers](https://docs.sim-on.com/books/3-app-overview/chapter/providers)** view -> [**Connections**](https://docs.sim-on.com/books/3-app-overview/page/connections) page from the [**Left Side Panel**](https://docs.sim-on.com/link/147#bkmrk-). Click "Add connections" button and select **IBM Maximo** from available providers. You'll be then redirected to the following page: 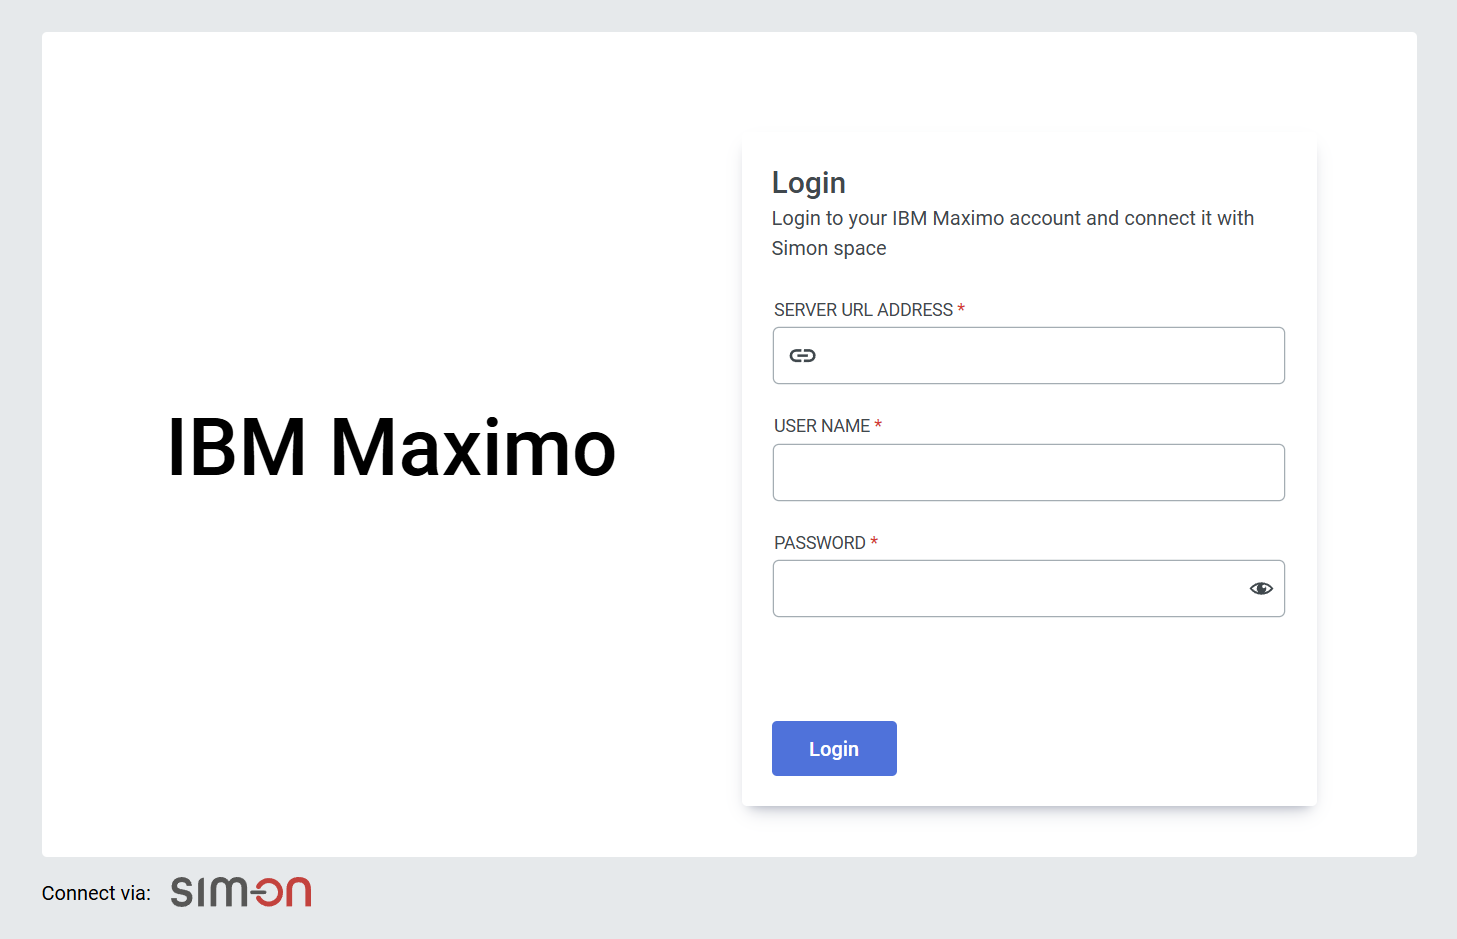 2\. Login with your IBM Maximo account 3\. Select the Organization and Site, then finalize with "connect" 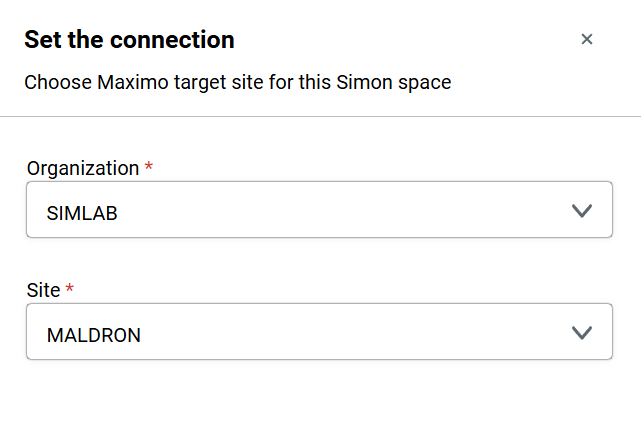 Connecting with Maximo lets you seamlessly link assets to the Sim-On environment. Browse these assets in the IBM Maximo specific [**Dashboard**](https://docs.sim-on.com/books/3-app-overview/chapter/dashboard) page: [**Resources**](https://docs.sim-on.com/books/3-app-overview/page/resources).  Additionally, with IBM Maximo comes a special feature for **Assets** in Sim-on: **linking** with IBM Maximo devices.See [**IBM Maximo Asset Link**](https://docs.sim-on.com/link/136#bkmrk--1) feature and [**Resources**](https://docs.sim-on.com/books/3-app-overview/page/resources) pages to learn more
# Homey 1\. To connect Homey provider, after [**creating a Project Space**](https://docs.sim-on.com/books/2-getting-started/chapter/project-setup) - navigate to the **[Providers](https://docs.sim-on.com/books/3-app-overview/chapter/providers)** view -> [**Connections**](https://docs.sim-on.com/books/3-app-overview/page/connections) page from the [**Left Side Panel**](https://docs.sim-on.com/link/147#bkmrk-). Click  button and select **Homey** from available providers (*you'll be redirected to the provider web page.*) 2\. Login with your Homey account: 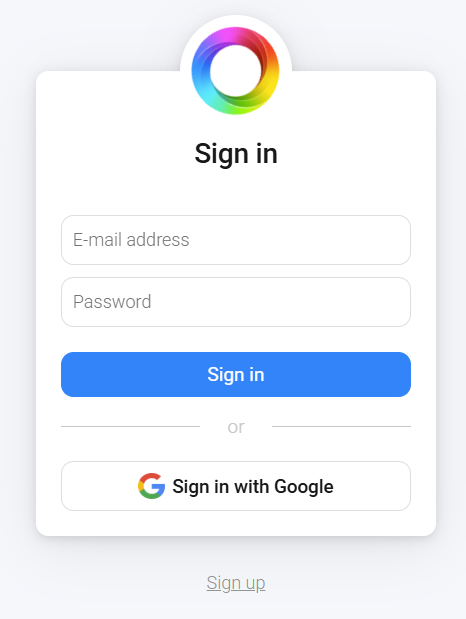 3\. Allow the following permissions for both apps: 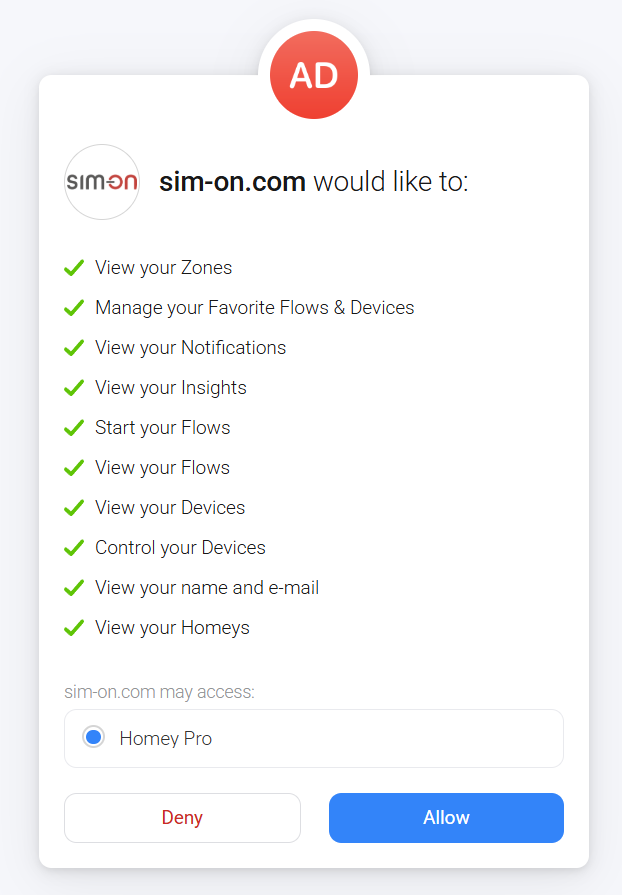 4\. Select your central unit for pairing: 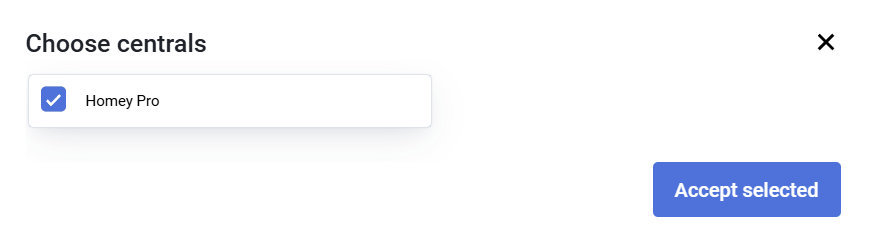 Now you can add and manage your Homey devices within the Sim-on