# SmartThings

<table border="1" id="bkmrk--1" style="border-collapse: collapse; width: 100%; border-width: 0px; height: 2259.81px;"><colgroup><col style="width: 50%;"></col><col style="width: 50%;"></col></colgroup><tbody><tr style="height: 248.288px;"><td style="border-width: 0px; height: 248.288px;">**1.**

To connect with **Samsung's SmartThings**, choose the option to Import rooms and select **SmartThings**. You will be redirected to the **Samsung Account** page.

<p class="callout info">See the <span style="color: rgb(53, 152, 219);">[**list of smarthome providers**](https://docs.sim-on.com/books/2-getting-started/chapter/providers)</span> in **detailed project setup**, to check which ones are supported</p>

</td><td style="border-width: 0px; height: 248.288px;">![obraz.png](https://docs.sim-on.com/uploads/images/gallery/2024-08/scaled-1680-/Vdwobraz.png)

</td></tr><tr style="height: 359.8px;"><td style="border-width: 0px; height: 359.8px;">**
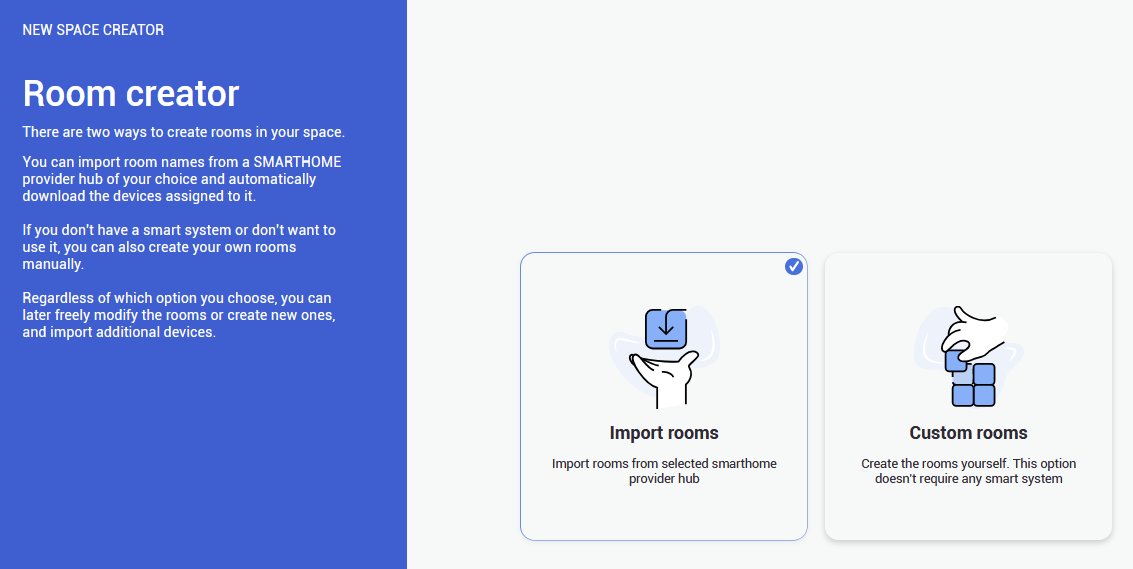
2.**

On the **Samsung's Account page** you will be asked to log into your **Samsung Account**, to proceed.

</td><td style="border-width: 0px; height: 359.8px;">![obraz.png](https://docs.sim-on.com/uploads/images/gallery/2024-08/scaled-1680-/2RVobraz.png)  
</td></tr><tr style="height: 147.275px;"><td style="border-width: 0px; height: 147.275px;">**
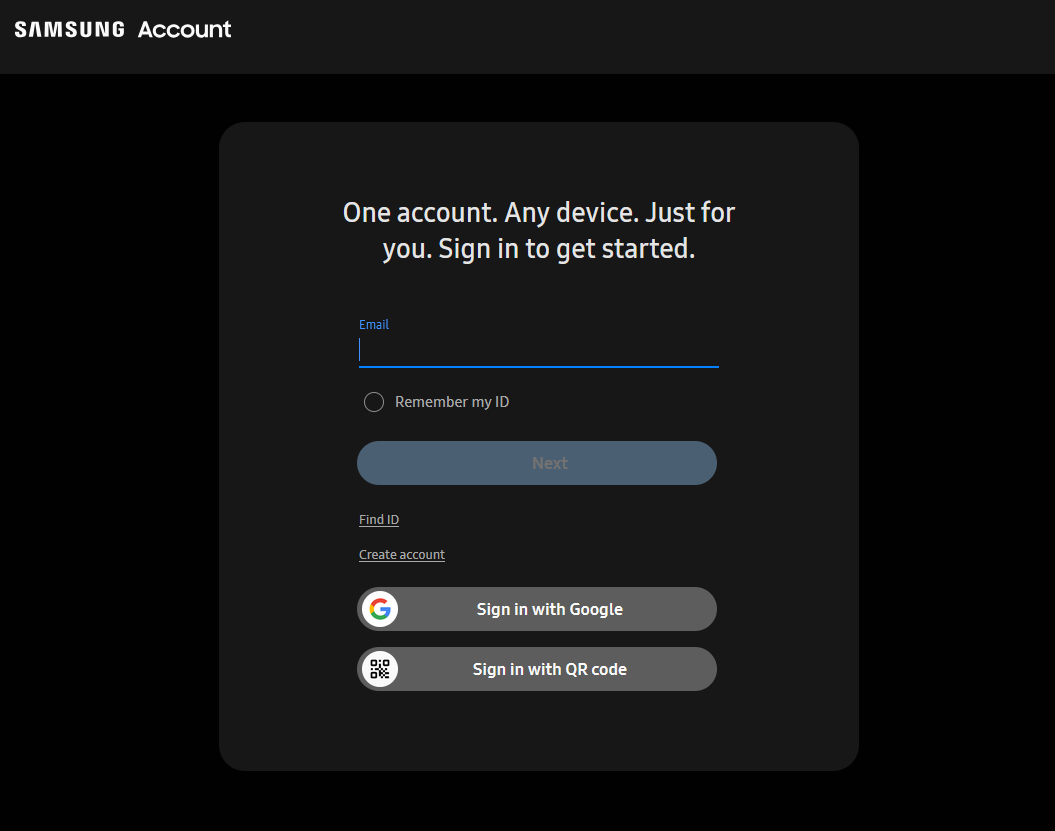
3.**

After you log in, you need to allow access for **SIM-ON** to connect to the system. In the dropdown window you will see all of the available, connected hubs.

</td><td style="border-width: 0px; height: 147.275px;">![obraz.png](https://docs.sim-on.com/uploads/images/gallery/2024-08/scaled-1680-/nXQobraz.png)

</td></tr><tr style="height: 265.05px;"><td style="border-width: 0px; height: 265.05px;">**
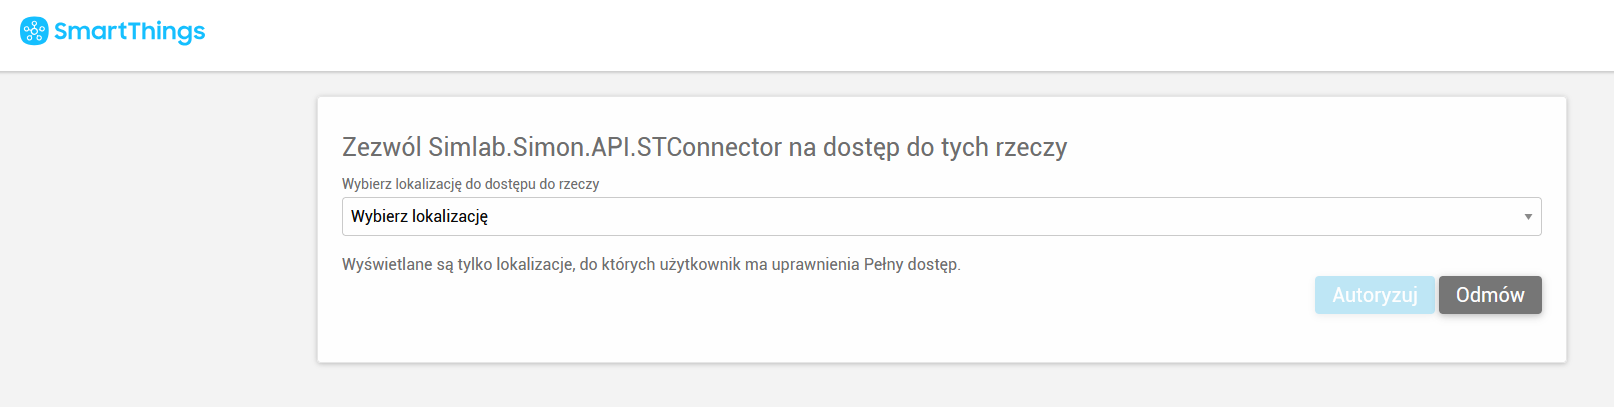
4.**

After choosing the hub, you need to set all the privileges to authorize the connection.  
  
Repeat these two steps (3,4) to add multiple hubs.

</td><td style="border-width: 0px; height: 265.05px;">![obraz.png](https://docs.sim-on.com/uploads/images/gallery/2024-08/scaled-1680-/xV9obraz.png)</td></tr><tr style="height: 309.475px;"><td style="border-width: 0px; height: 309.475px;">**
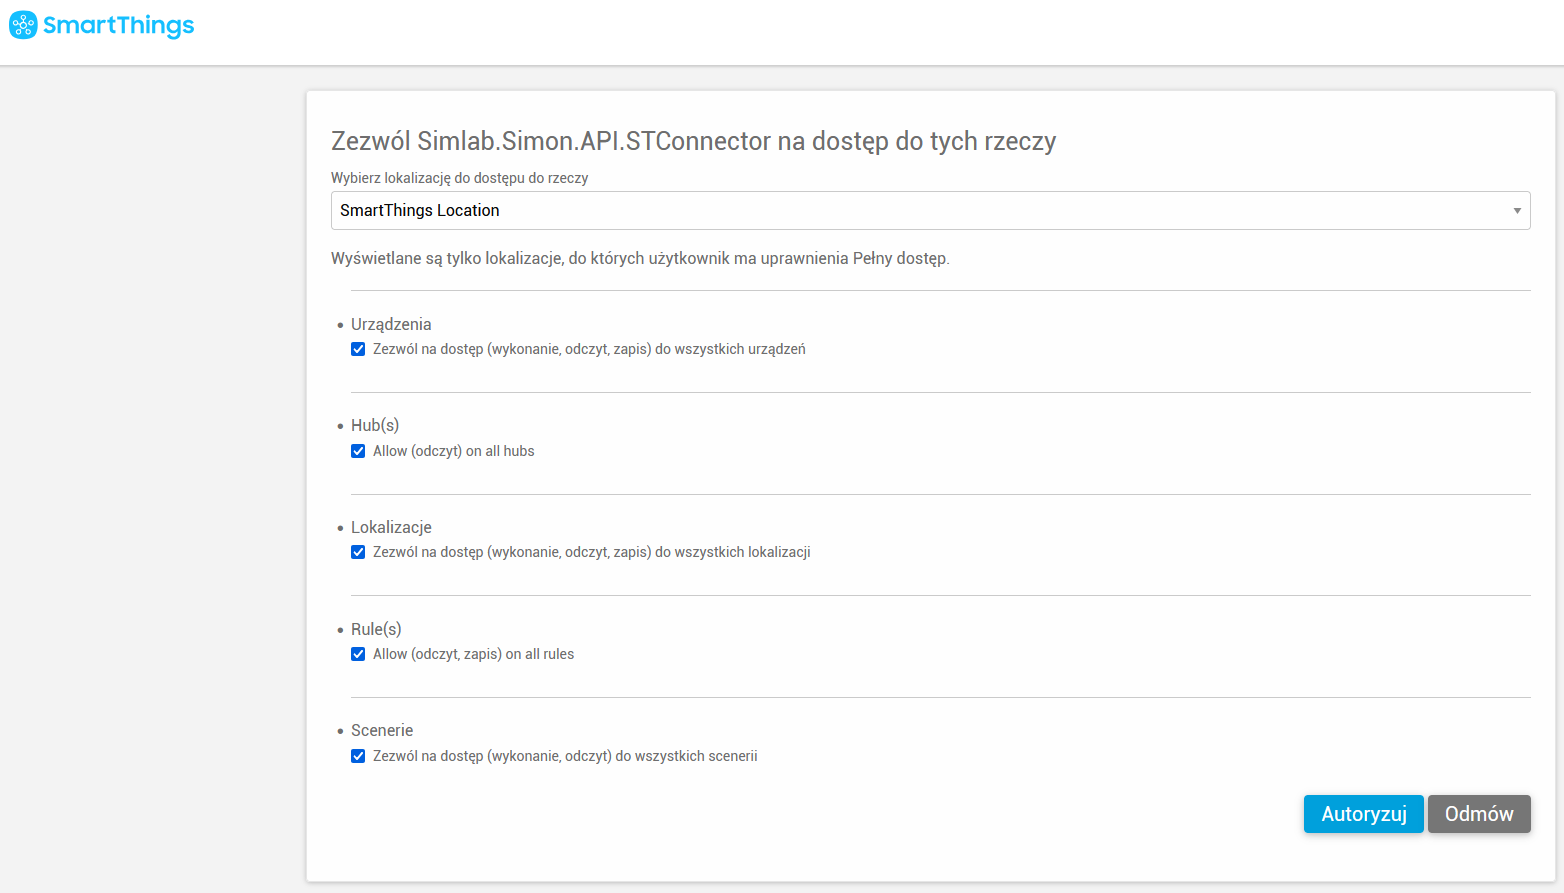
5.**

After completing **Authorization**, you need to go back to the **SIM-ON** tab and the hub(s) you added will be now available.

Now you can add room(s) from the hub for the project.
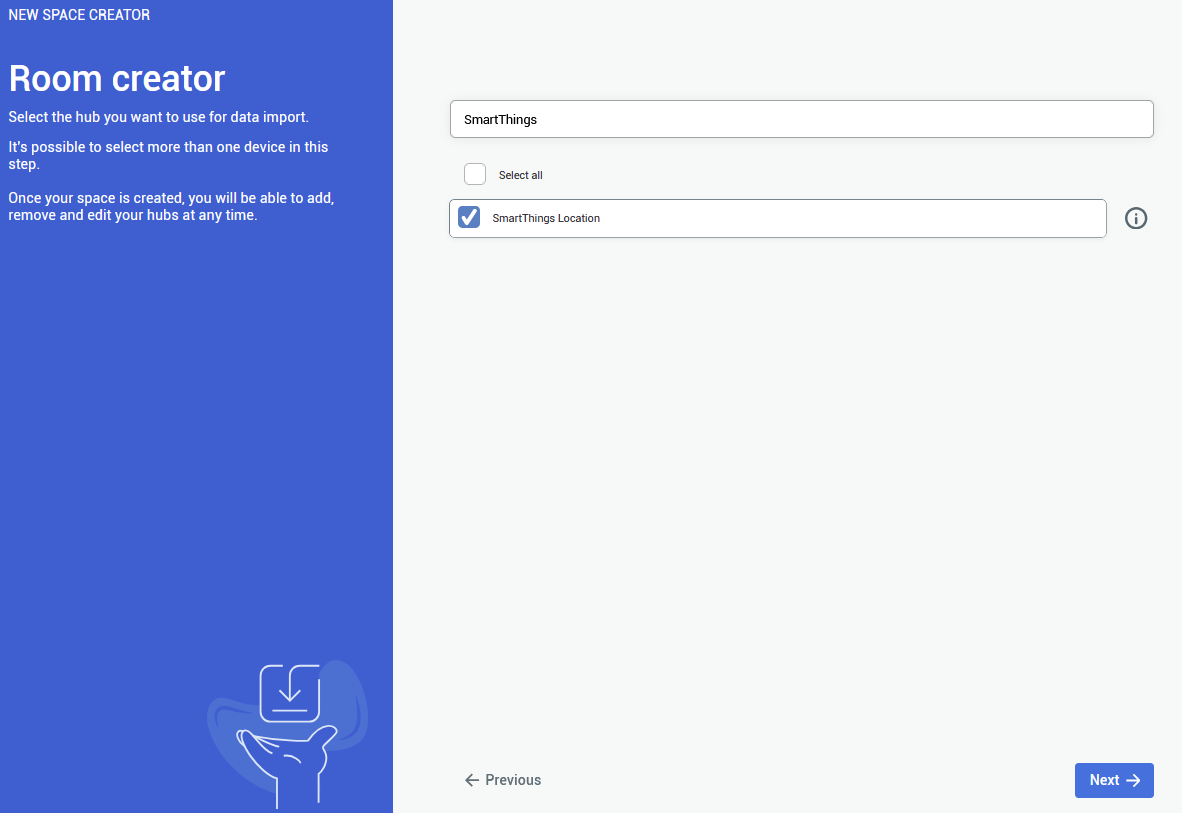
</td><td style="border-width: 0px; height: 309.475px;">![obraz.png](https://docs.sim-on.com/uploads/images/gallery/2024-08/scaled-1680-/FkRobraz.png)</td></tr><tr style="height: 312.8px;"><td style="border-width: 0px; height: 312.8px;">**6.**

Here you will be presented with the list of already existing rooms in your **SmartThings** hub. Choose any number of the rooms to be imported to **SIM-ON** then proceed.

<p class="callout info">You are not required to import any of the rooms, although it is recommended - to keep the consistency between smarthome environments  
</p>

<p class="callout info">Rooms can be added and edited afterwards as well
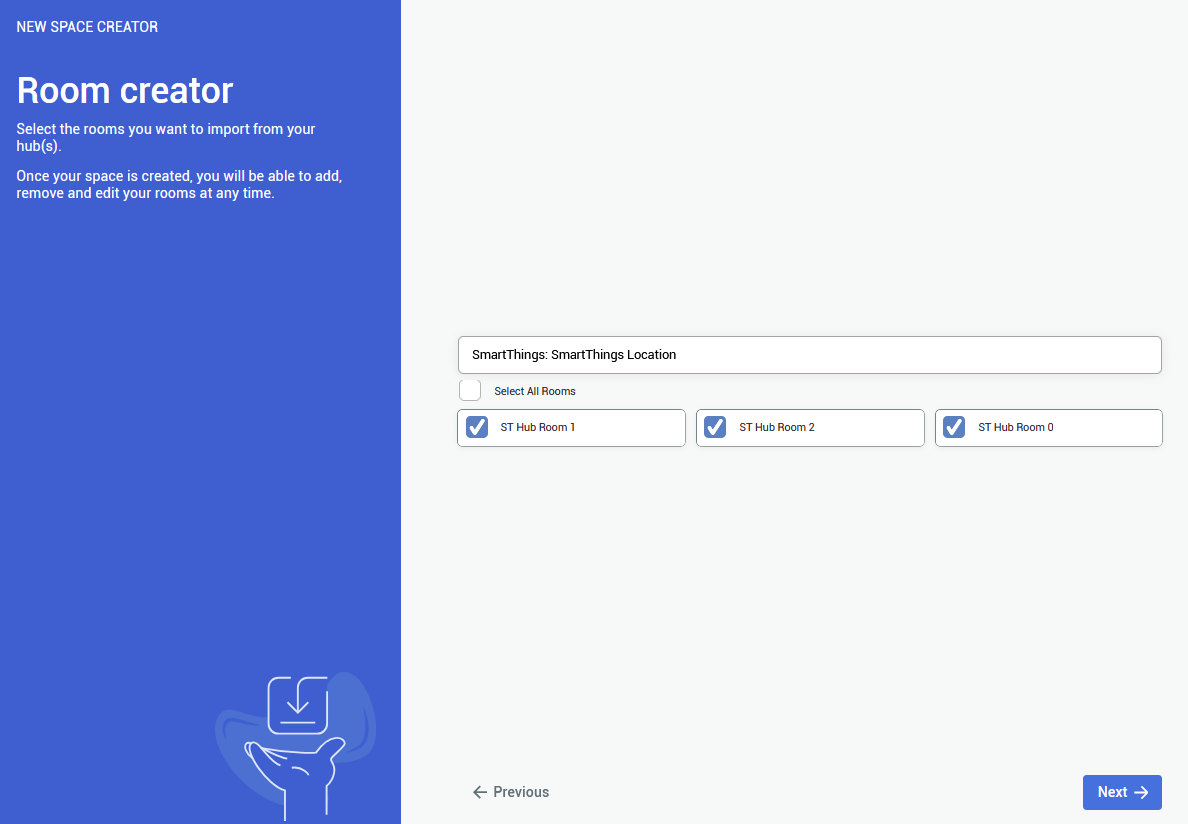
</p>

</td><td style="border-width: 0px; height: 312.8px;">![obraz.png](https://docs.sim-on.com/uploads/images/gallery/2024-08/scaled-1680-/Fwxobraz.png)</td></tr><tr style="height: 318.35px;"><td style="border-width: 0px; height: 318.35px;">**7.**

The last step is to choose the **Matterport virtual tour** for the project to be used, through the provided **Matterport link**.

<p class="callout warning">To use a **private link** you will be asked to **log in** to appropriate **Matterport Account**</p>

</td><td style="border-width: 0px; height: 318.35px;">![matterport link paste.png](https://docs.sim-on.com/uploads/images/gallery/2024-08/scaled-1680-/matterport-link-paste.png)</td></tr><tr style="height: 298.775px;"><td style="border-width: 0px; height: 298.775px;">**
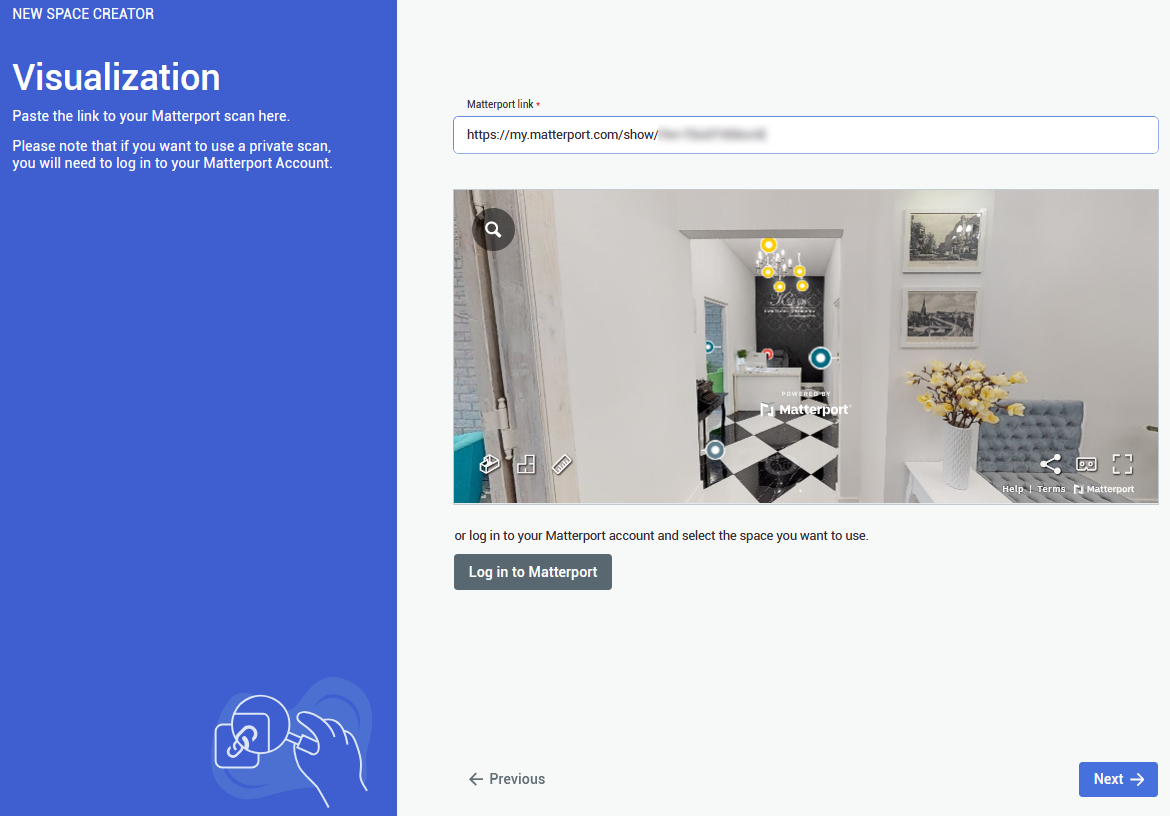
8.**

**Congratulations!**

You've successfully imported the devices from **Samsung SmartThings**. By clicking confirm, you will see your space with an access to all of the devices.

</td><td style="border-width: 0px; height: 298.775px;">![obraz.png](https://docs.sim-on.com/uploads/images/gallery/2024-08/scaled-1680-/3yMobraz.png)  
</td></tr></tbody></table>

<span style="color: rgb(53, 152, 219);">[**Continue to project setup**](https://docs.sim-on.com/link/130#bkmrk-step-4%3A-assigning-sw)</span>

---

<p class="callout info">You can add a provider by selecting Providers in the side bar, and then clicking on ![Add connections.png](https://docs.sim-on.com/uploads/images/gallery/2024-08/scaled-1680-/add-connections.png)button. The process will look exactly the same</p>

<p class="callout warning">You can also delete a connection by clicking on ![remove connections.png](https://docs.sim-on.com/uploads/images/gallery/2024-08/scaled-1680-/remove-connections.png)button. Devices imported from the selected hub will be also deleted</p>