# Quick Access Panel
| #### Devices
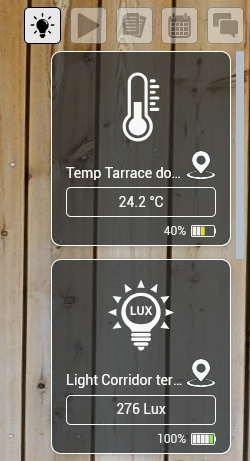
If there are connected devices, you will see a list containing all of them. You can interact with them by clicking their thumbnails. Depending on the **Device type** there will be **different** information, status and icon for the device, as well as various options
**To find the device's location, click on the **pin**  icon. You'll see the marker of the device and be transported to its place.**
| | 
|
---
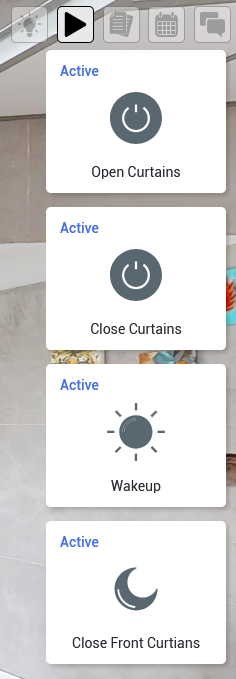
#### Scenes
Quick access to all of the scenes in the **[Dashboard](https://docs.sim-on.com/books/3-app-overview/page/dashboard "Dashboard")**.
| In the Scenes tab you can manage the devices scenario for the whole room/area. After adding a scenario, you’ll have access to play the scene or change its options (*name, icon, trigger, scene construction*).
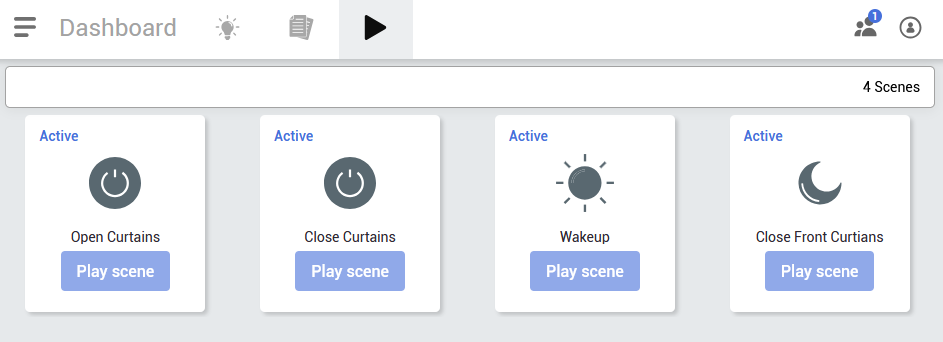
To play the scene, click on the button/icon and the status will change.
|  |
---
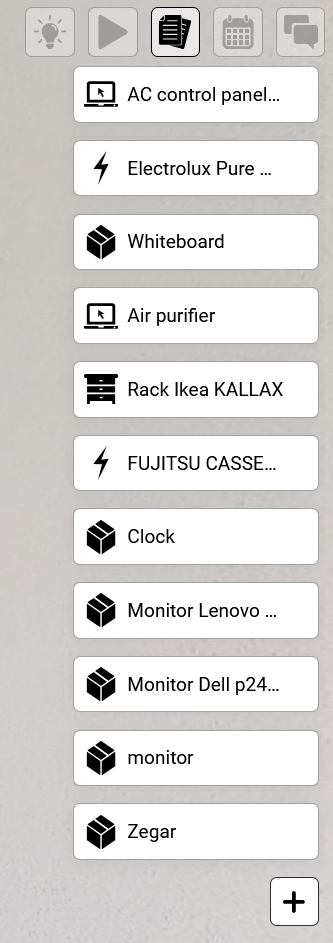
#### Assets
Asset tool provides a comprehensive repository for all data related to the components and equipment of a property. Users can place Asset icons within a 3D space tour, each linking to a detailed database that includes text descriptions, active links, images, documents, and YouTube videos. It also allows users to link events directly to the property maintenance schedule.

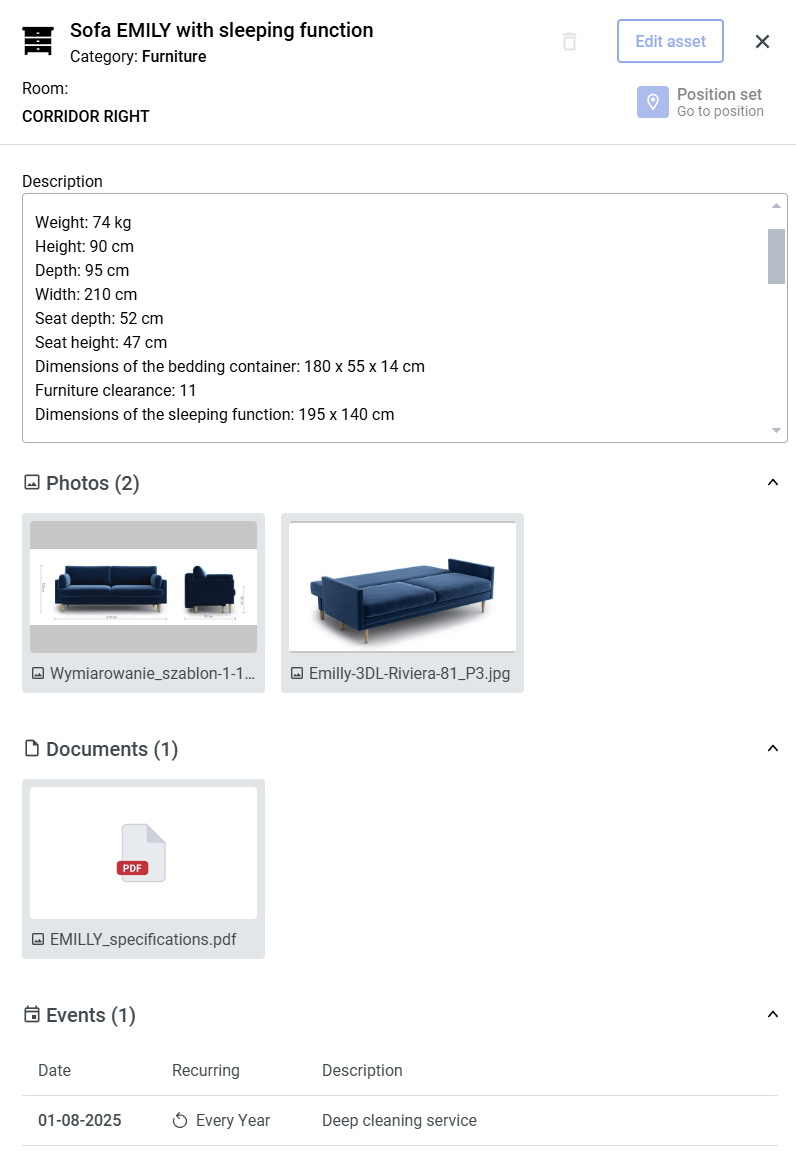
Clicking on an **Assets tab** - you will see the **Asset List** displaying available assets within project. Clicking on **Asset Tile** or **Asset Icon** in the list within 3D space will open with model details will pop up. On the details window you can locate the asset, add media or visit the dashboard.
| **Asset list**
| **Asset Panel**
|
You can also add another asset from here - hover over  icon, located at the bottom right of the asset list (if there are a lot of assets you'll have to scroll down the asset list to find it) to reveal  button.
The **Asset Panel** will appear:
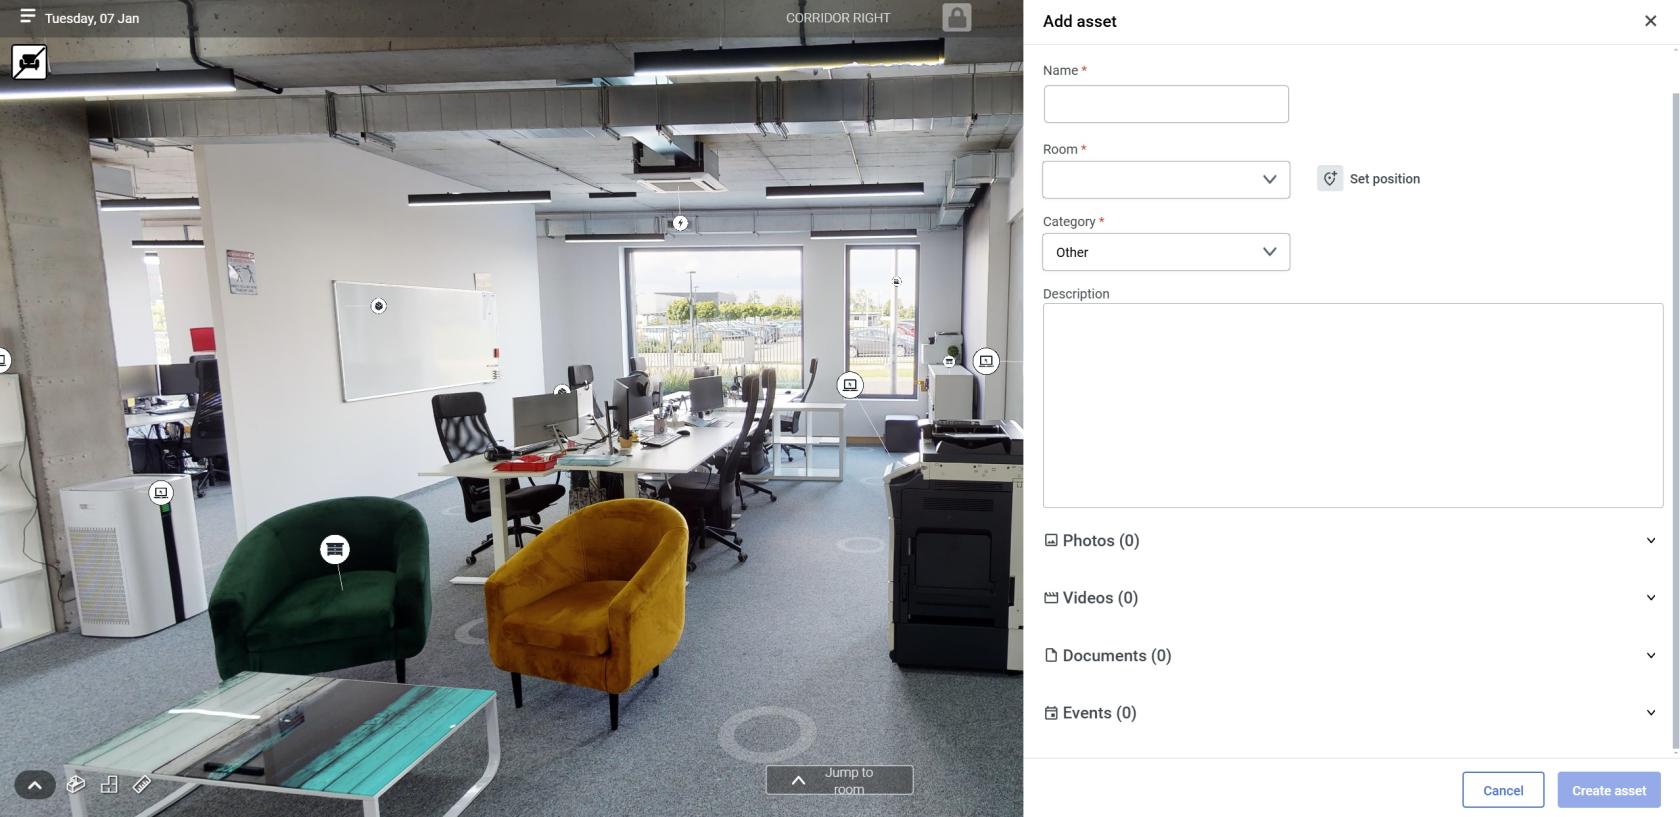
To **Create an Asset**, all fields marked with a **red asterisk \* **need to be filled. You can add multiple photos, videos, documents or create events with your asset, as seen in the prior screenshot.
When you're done, click the  button to finalize asset creation. From now on your Asset will be visible in the **Asset List** and in 3D view (if you assigned it a position.)
##### **Maximo Links**
If there is currently added IBM Maximo provider to the scene, **Simon Assets** will have an additional option of linking with **Maximo Assets,** as seen in the image below, an additional option field appears at the bottom of the asset stack, under Events:
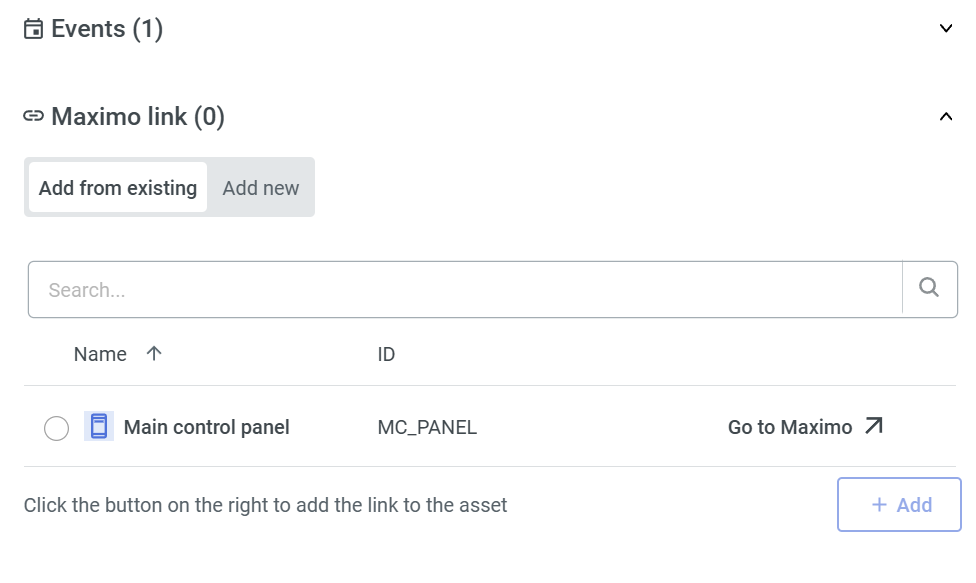
To Learn more about IBM Maximo integration, see: [**adding IBM Maximo to the Scene**](https://docs.sim-on.com/books/2-getting-started/page/ibm-maximo) and [**additional Resources view**](https://docs.sim-on.com/books/3-app-overview/page/resources).
---
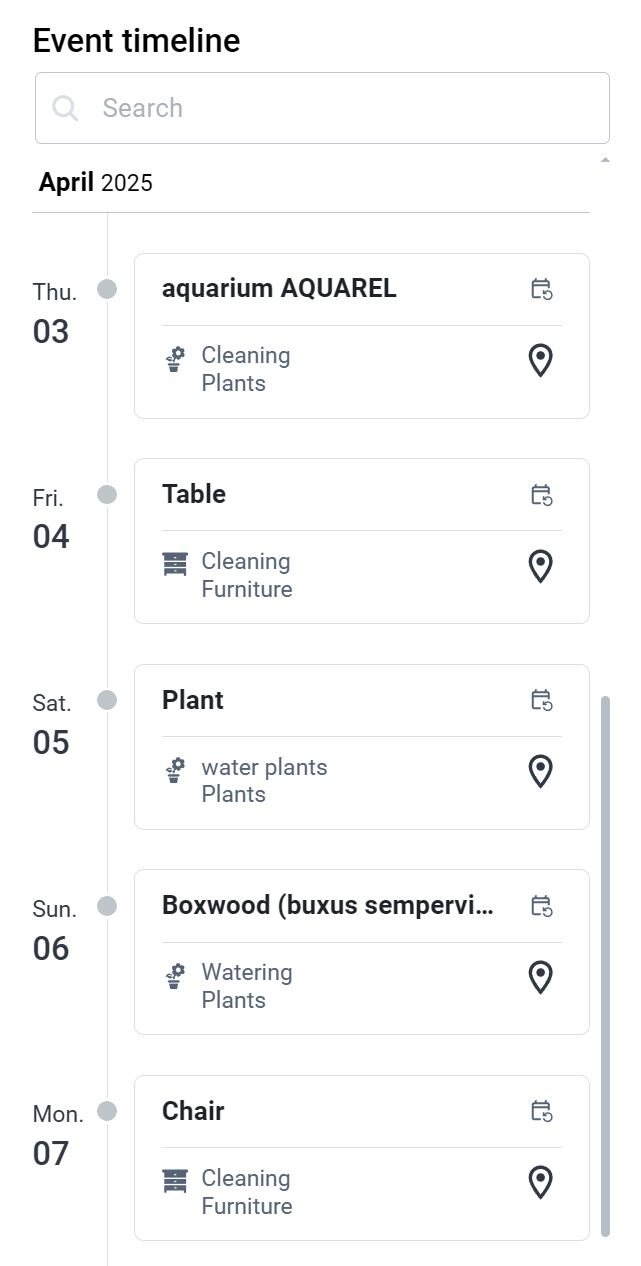
#### Events
Access to the event timeline showing incoming events.
| Events feature lets you track and manage different events happening in your home.
##### 1. Event Timeline:
- You can view all the events happening in your home on a timeline, showing when each event takes place.
- The timeline shows you events as they happen, so you’re always up to date.
##### 2. Search:
- You can search for specific device using the **Search panel** at the top of the window.

- If you want to see the **location** for a specific asset, click on the **pin icon** of the asset to find it easily.
##### 3. Edit Events:
- If you need to change details about an event, just click on the **Event Tile of the Asset**, to quickly open an [**Asset Panel**](https://docs.sim-on.com/link/148#bkmrk-asset-list-%C2%A0-asset-d) of the device and edit it from there.
| #### 
|
---
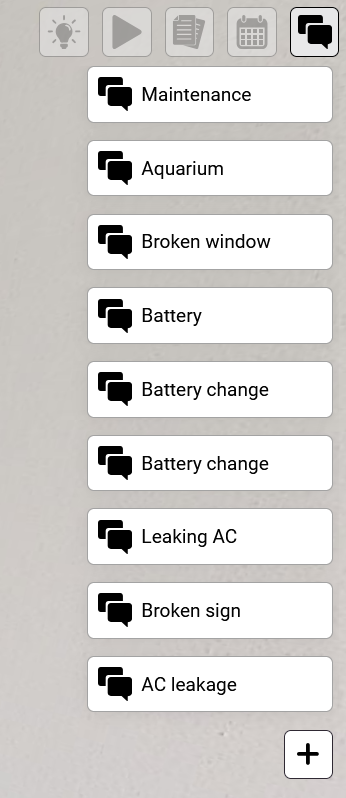
#### Tickets
In the Ticket tabs you can find comments added in the project. You can create a new one or edit an existing one.
To manage a detailed list of the tickets, see [**Tickets page in Dashboard**](https://docs.sim-on.com/books/3-app-overview/page/tickets)
| **Tickets list**
| | **Detailed view**
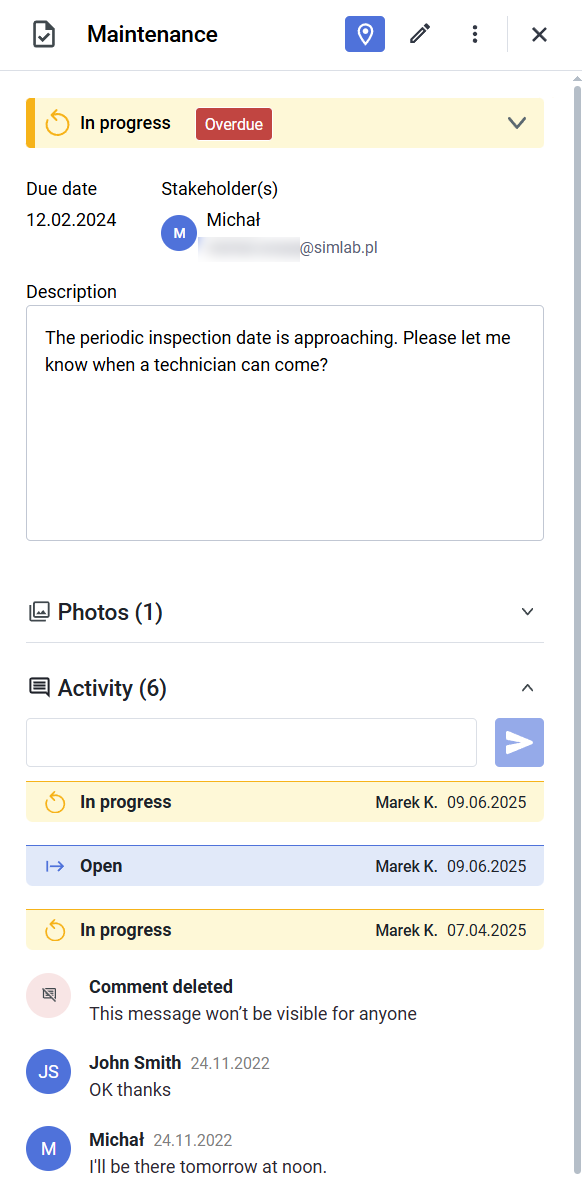
|
##### Reporting Problems
- If something isn’t working, like a light or thermostat, you can report it through the system’s app or interface.
##### Maintenance Requests
- You can create tickets for routine tasks, like changing air filters or checking battery levels.
- The system might allow to connect with service providers to create tickets for them for fixing or maintenance.
##### New Ideas
- If you have an idea for a new feature, you can suggest it by creating a ticket.
- **Voting:** Others can vote on your suggestion, helping the team decide what to work on next.
##### Support and Troubleshooting
- If you need support, you can create a ticket and track its progress.
- The ticket can be connected to a specialist, making it easier to get help when you need it.