# Preparing Project Space

This tutorial will show you a step-by-step, basic project creation workflow. To learn more about every step and different features, see the following books: [<span style="text-decoration: underline; color: rgb(53, 152, 219);">**Getting Started**</span>](https://docs.sim-on.com/books/2-getting-started) for project creation related information and <span style="color: rgb(53, 152, 219);">[<span style="text-decoration: underline;">**App overview**</span>](https://docs.sim-on.com/books/3-app-overview)</span> for comprehensive descriptions of SIMON features.

To use **SIM-ON** you will need two things:

- A Matterport scan
- Optionally: (*supported*) Smarthome provider

<p class="callout info">For this tutorial you will be **provided with a Matterport scan** of an office, but **we recommend you to use your own scan**, together with a **Smarthome provider** if possible</p>

Provided tutorial material:

- **<span style="color: rgb(53, 152, 219);">[Matterport Scan](https://my.matterport.com/show/?m=KnmwKwMaj4s)</span>**

<p class="callout info">At any time, in this tutorial, you can access the provided link from the **Attachments** section.  
(*located in the top left corner of the screen*)</p>

---

#### **New Space Creation**

After [<span style="text-decoration: underline; color: rgb(53, 152, 219);">**Logging into SIM-ON**</span>](https://identity.simlab.pl/Account/Login), you will first see the <span style="text-decoration: underline; color: rgb(53, 152, 219);">**browser view.**</span> Here you will find **news** and your **available spaces.**
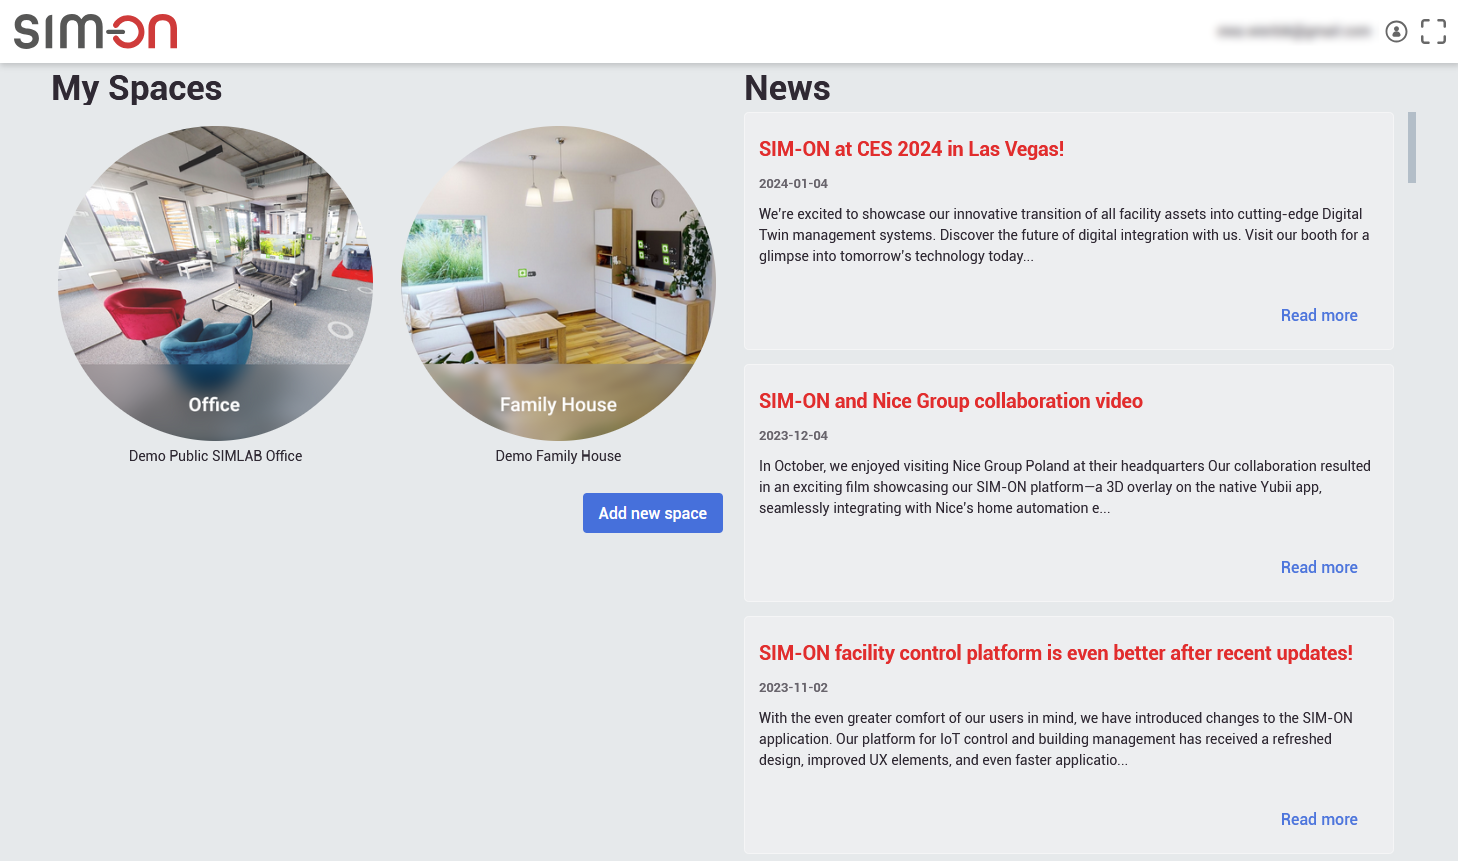
![image.png](https://docs.sim-on.com/uploads/images/gallery/2025-01/scaled-1680-/4Sdimage.png)

- Press ![image.png](https://docs.sim-on.com/uploads/images/gallery/2025-01/scaled-1680-/mhPimage.png) button to begin the **space creation** process.

![obraz.png](https://docs.sim-on.com/uploads/images/gallery/2024-08/scaled-1680-/kgoobraz.png)

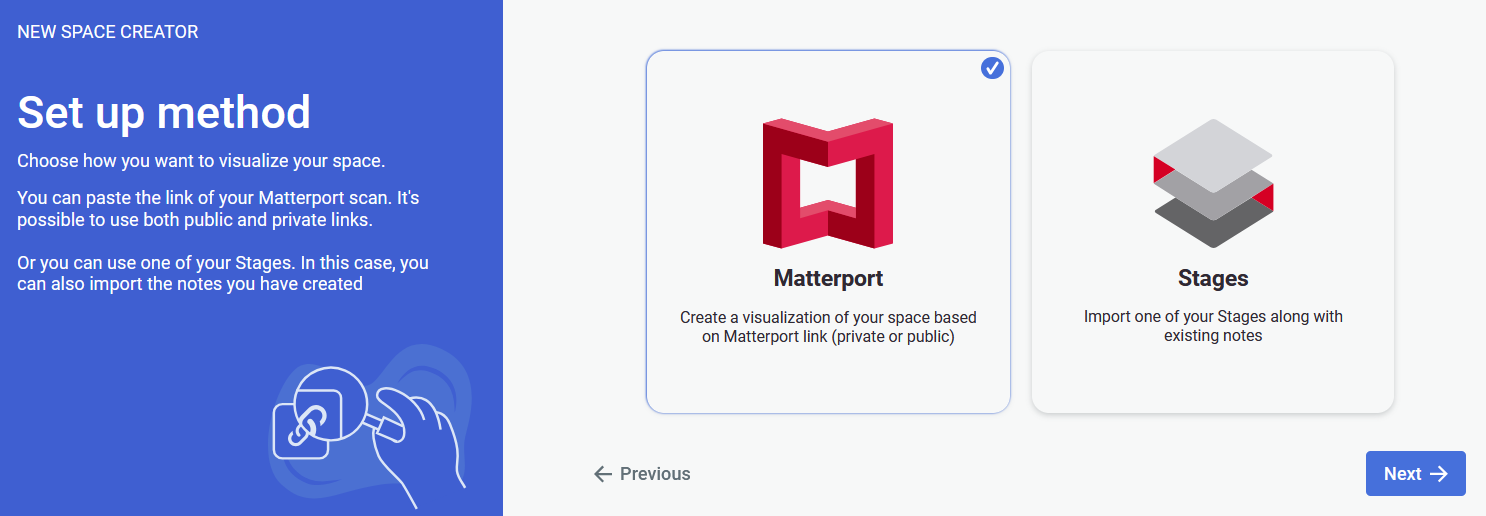
- Select **Matterport** set up method as we will be using the provided **Matterport link** in this tutorial.
- Press ![image.png](https://docs.sim-on.com/uploads/images/gallery/2025-01/scaled-1680-/TeLimage.png) to proceed.

#### Room creator

![obraz.png](https://docs.sim-on.com/uploads/images/gallery/2024-08/scaled-1680-/3x1obraz.png)

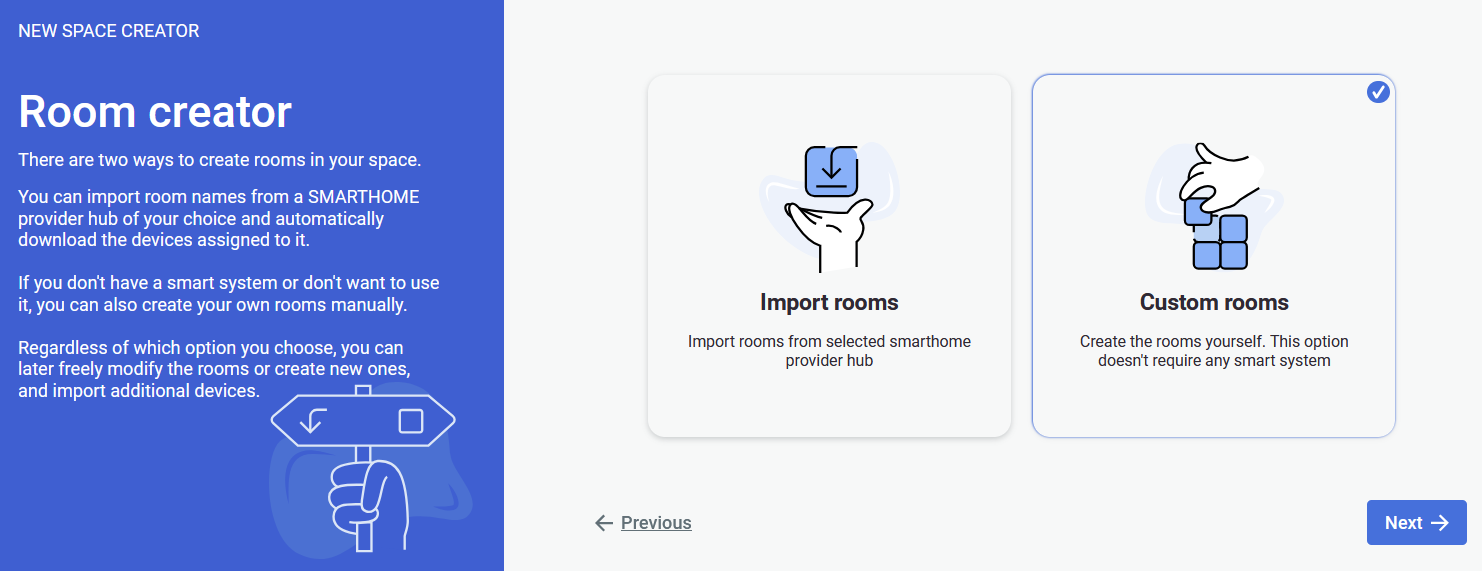
Next, we will create starter rooms.

- Select **Custom rooms** option, as it allows to proceed **without linking** a smarthome provider.
- Press ![image.png](https://docs.sim-on.com/uploads/images/gallery/2025-01/scaled-1680-/TeLimage.png) to proceed.

![obraz.png](https://docs.sim-on.com/uploads/images/gallery/2024-08/scaled-1680-/hgXobraz.png)

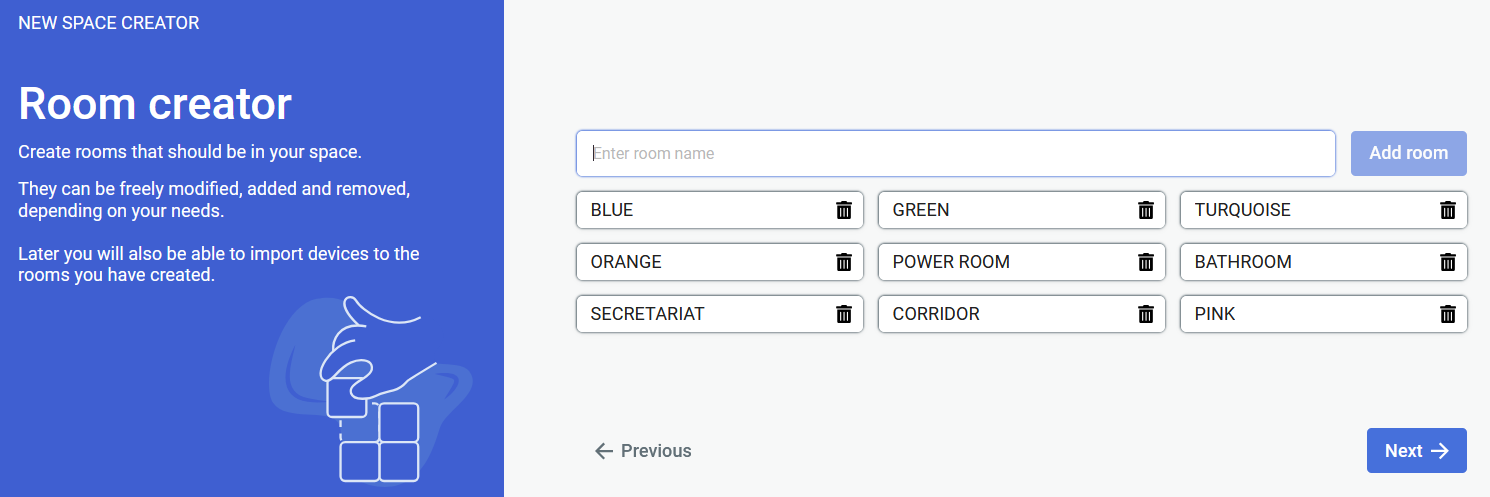
We need **at least one** **room** to proceed with project creation. Here we will only create a **placeholder room** to create the project. Proper room creation will be handled at a later stage, within the project. This way you will be creating rooms at the fly, while assigning them to the sweeps in the project.

<p class="callout info">If you are following this tutorial with **your own Matterport Scan**, and know the rooms beforehand - feel free to include them in this step. Otherwise keep following this tutorial</p>

- Create a single, placeholder room (We will change its name later.)
- Press ![image.png](https://docs.sim-on.com/uploads/images/gallery/2025-01/scaled-1680-/TeLimage.png) to proceed.

#### Linking Matterport scan

![obraz.png](https://docs.sim-on.com/uploads/images/gallery/2024-08/scaled-1680-/GBcobraz.png)

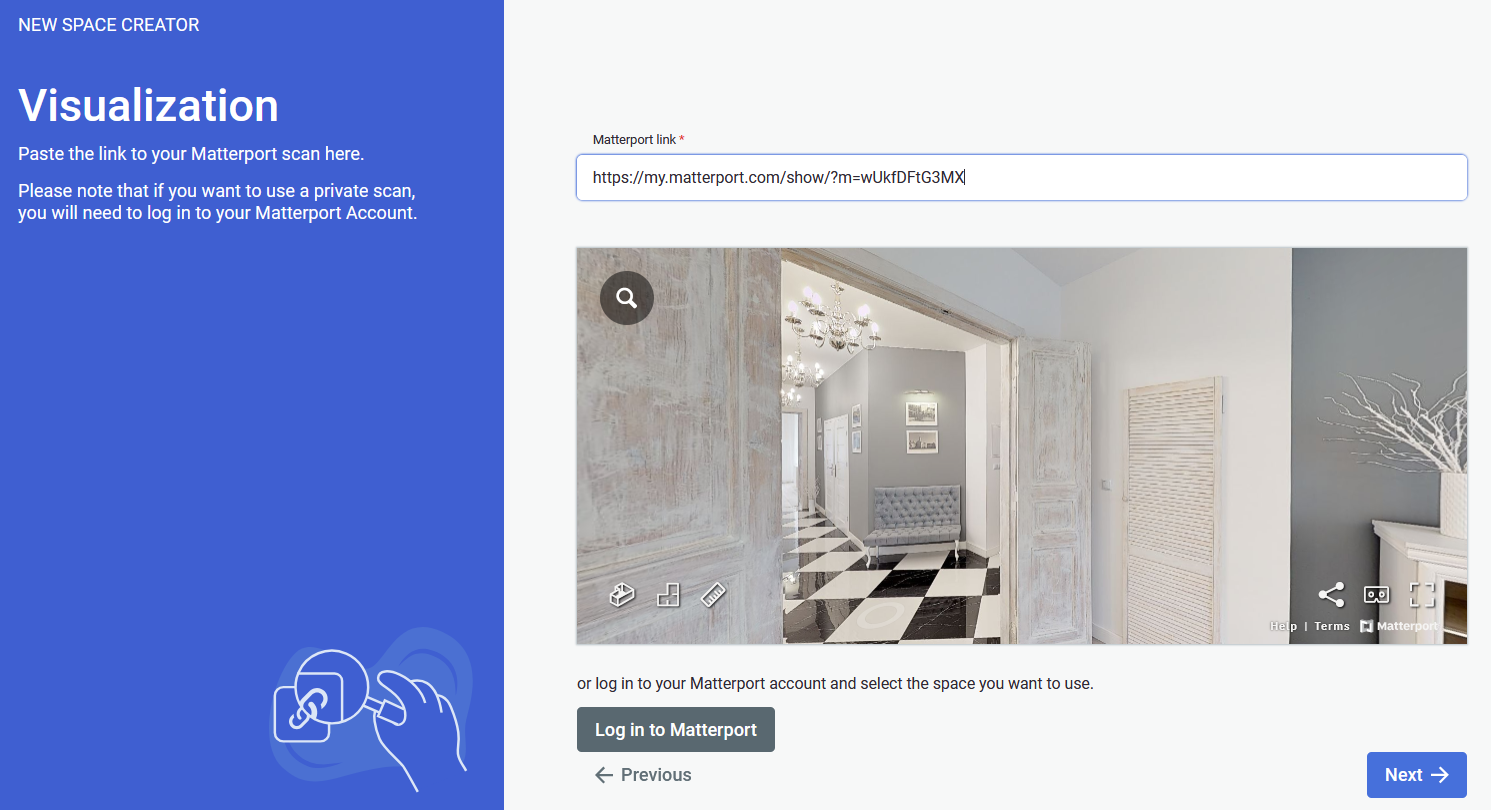
Now we to provide a **Matterport link** to be used as a 3D space for the project.

- Paste the <span style="text-decoration: underline; color: rgb(53, 152, 219);">**Provided Matterport Link**</span> into the required field.
- Press ![image.png](https://docs.sim-on.com/uploads/images/gallery/2025-01/scaled-1680-/TeLimage.png) to finalize the space creation.

You've successfully created a new SIM-ON space! Proceed to next page of the tutorial where you'll learn how to further set up the scene.