Dashboard
Central hub for all the devices, assets and scenes, sorted by rooms.
Devices
In the Devices view you can see all the devices in the selected rooms or all devices in the project if All Rooms option is selected.
Device List
|
|

Device Details
| After clicking on one of the devices, you will see the device details. By clicking the pin |
|

Device Settings
|
By clicking settings
and visibility in the 3D view. |
 |
Device Structure
|
You can also see a device structure - it varies for different devices - there can be a few devices connected to one master device, or just one. It depends on the provider's hub structure and you can decide which elements should be visible in the 3D view. |
 |
Assets
An asset is a physical object (that lacks smart connectivity) you, as a user, wish to keep track of in the SIM-ON project space. For example assets, see the screenshot below.
In the Assets view you can see all the assets in the selected rooms or all Assets in the project if All Rooms option is selected.

|
|
 Filters
Selecting an asset tile will reveal it's details. Press "Edit asset" to manage the asset information and files uploaded to it.
 |
 |
IBM Maximo
If you have a connected Maximo provider to your space, you gain an additional feature within Assets to link them with Maximo assets:

|
Adding from existing lets you add a link that you might have added before in the Resources page. This will reveal a similar Maximo Links list for you to choose from:
|
Selecting "Add new" will open the following Maximo List to add new link from. |
 When asset is not linked with Maximo, you will see the following options:
Scenes
Automate the Devices behavior with various triggers and states within the project.
Scene view

In the Scene view you can see all the scenes available. Scenes can manage different scenarios including turning on the lights on, planning to turn on or off different devices depending on the various triggers. Additionally you can add new scenes from here as well or delete the existing ones.
To delete or edit a scene, click the more options ![]() button on the scene tile.
button on the scene tile.
You need to have appropriate permissions to edit Scenes.
Scene editor

To add a new scene, click the ![]() button. This will invoke the Scene editor view. You need to provide a name, icon, select scene trigger and create scene construction and then save it.
button. This will invoke the Scene editor view. You need to provide a name, icon, select scene trigger and create scene construction and then save it.
Tickets
Create, manage and assign tickets for other space users.

The Tickets view in the Dashboard is a detailed Ticket management view for the project, where you can see the status of every ticket together with other necessary information such as:
- Due date
- Ticket Stakeholder
- Last edit time
From here, you can easily go to the location of the ticket, through location ![]() button located at the end of the ticket tile.
button located at the end of the ticket tile.
Ticket Creation


The ticket creation system can be used in following situations:
Reporting Problems
- If something isn’t working, like a light or thermostat, you can report it through the system’s app or interface.
Maintenance Requests
- You can create tickets for routine tasks, like changing air filters or checking battery levels.
- The system might allow to connect with service providers to create tickets for them for fixing or maintenance.
New Ideas
- If you have an idea for a new feature, you can suggest it by creating a ticket.
- Voting: Others can vote on your suggestion, helping the team decide what to work on next.
Support and Troubleshooting
- If you need support, you can create a ticket and track its progress.
- The ticket can be connected to a specialist, making it easier to get help when you need it.
To edit a ticket, click on the more options ![]() button located at the end of the Ticket tile.
button located at the end of the Ticket tile.
This will open a new window with following options:

Filter, Sort and Search

![]()
The ticket management functions are fitted with comprehensive filter, sort and search functionality. Handle large amounts of tickets by:
- status
- date
- assignee
- creation time
- name
Resources*
This View is specific only to IBM Maximo provider. See how to connect an IBM Maximo provider
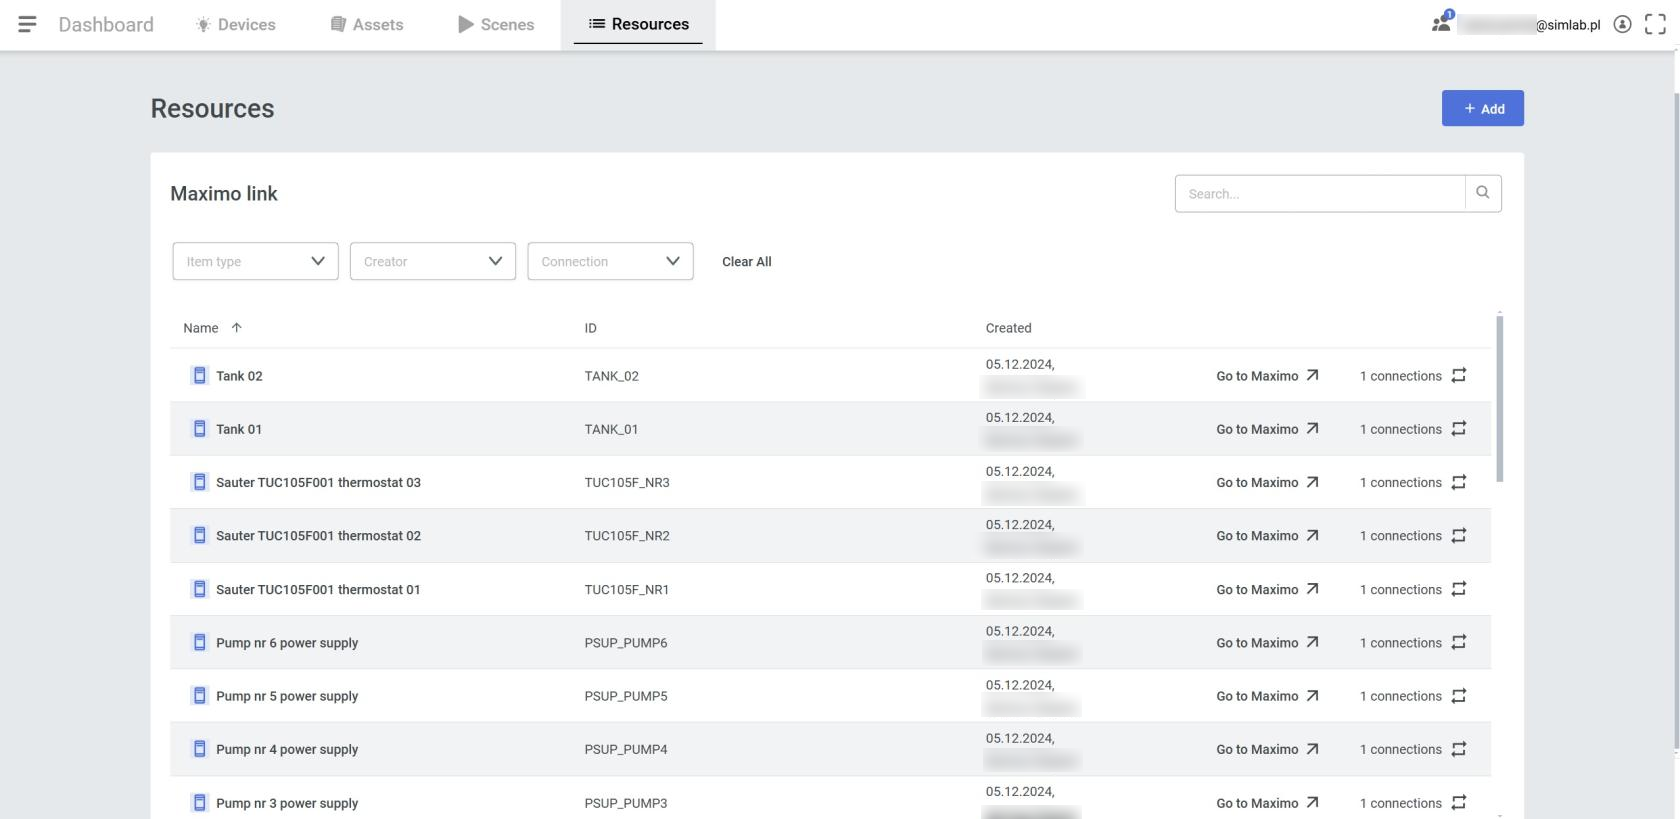
Manage Maximo links, and asset connections
Inspecting a Maximo item shows currently linked assets, together with a quick access to their location. Additionally, we can go directly to the linked item in the Maximo site.

Adding Maximo Link
From this panel you can also "pre-add" Maximo items for easier linking/management in the future. Press the " + Add " button
With the revealed panel, we must choose the Maximo system we want to list items from and select the desired one. The name of an item can be changed for the Simon side, but it's not necessary, as it will inherit the name by default.