Sweeps
Assigning sweeps to a room
|
To place devices within the 3D space of Virtual Tour, first we need to define the rooms within the 3D space by assigning them to "sweeps".
‘Sweep’ as in a full Matterport camera rotation - A spot in the Matterport Space where a user can stand and look around (This includes 3D scan locations and 360º Views) |
 |
To assign sweeps, we need to be in the 3D Walk view. Click on the burger ![]() men
men
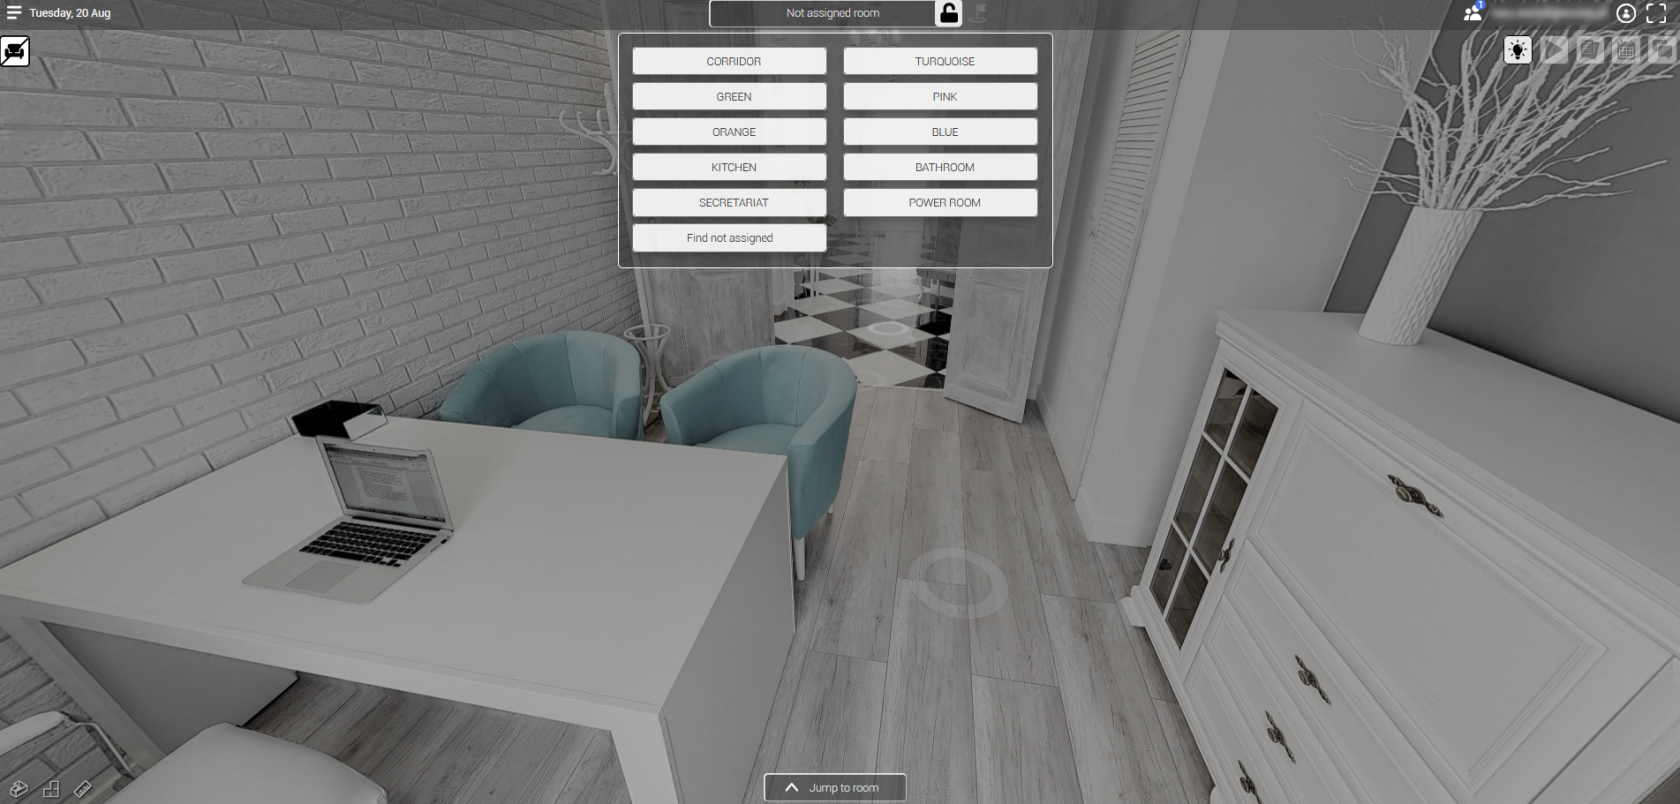
On the top section of the viewport, we will see "Not assigned room" and a closed lock ![]() icon. To assign the sweep to the room, click on the lock icon to unlock
icon. To assign the sweep to the room, click on the lock icon to unlock ![]() it, allowing you to edit the space.
it, allowing you to edit the space.

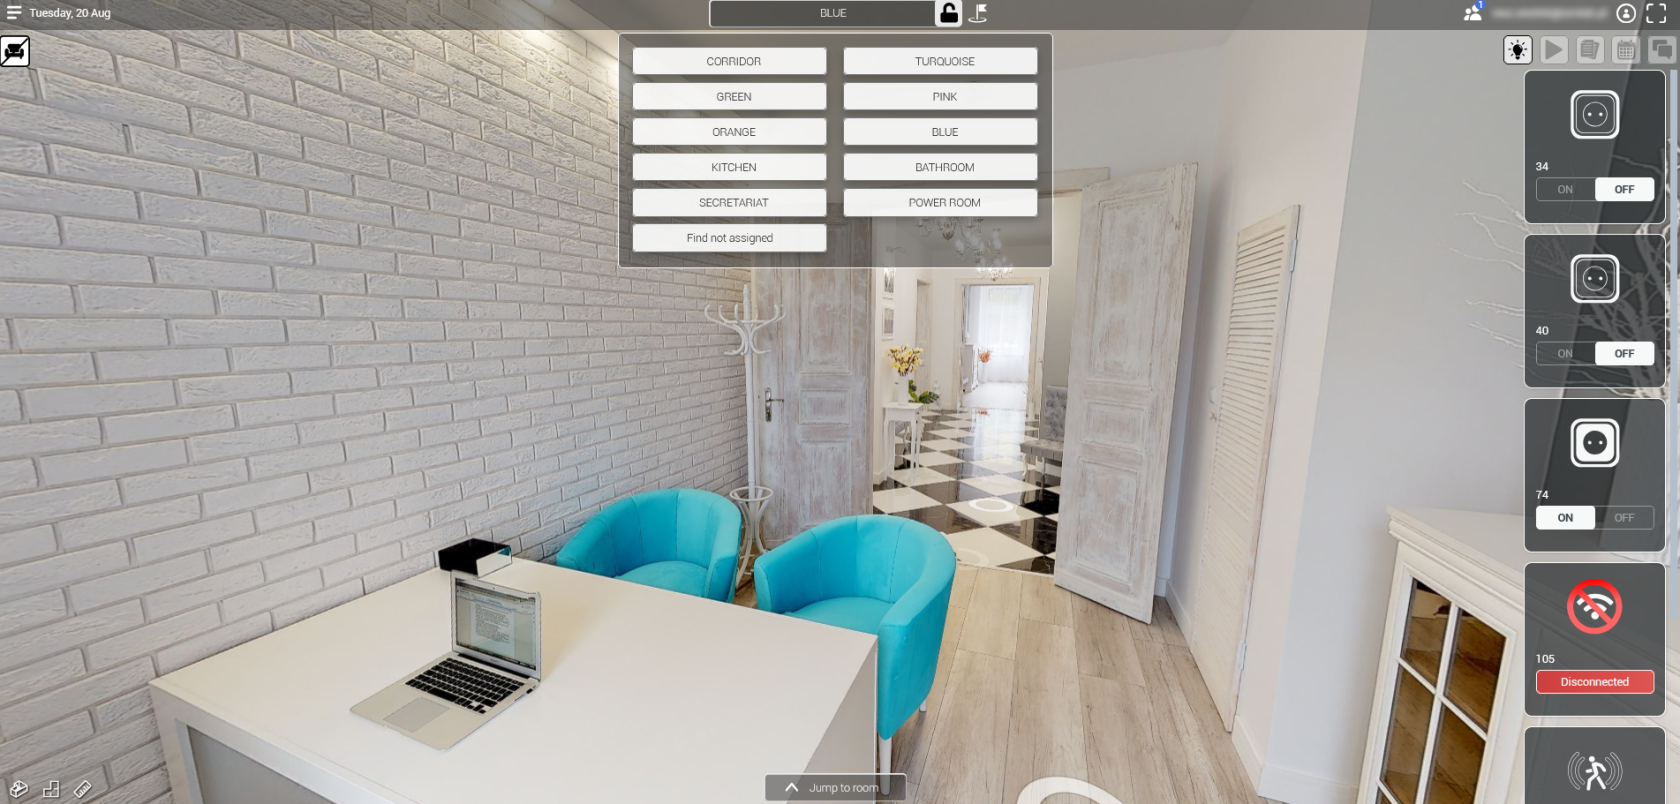
Make sure you know in which room you're in and select it from the list. Before assigning the sweep to the room, the colors are faded (this is an indicator that a given sweep does not belong to any room). Once you assign the sweep to the room you should see the view in the full color. Repeat the process until all the sweeps in the area are assigned to the corresponding room.

After assigning al the sweeps to the room some devices (if set up before) might appear on the right panel. Now, the last step is to rename them (if necessary) and add their locations
You can assign all the sweeps in the project the same way. To finish you need to lock editing by clicking the lock ![]() icon again.
icon again.
After assigning the sweeps to more rooms you'll be able to use the "Jump to room" feature located at the bottom of the viewport. Available rooms (the ones that you assigned the sweeps to) won't be greyed out and if you click on any of the rooms, you'll be transported to the nearest assigned sweep within the selected room
